Introduction
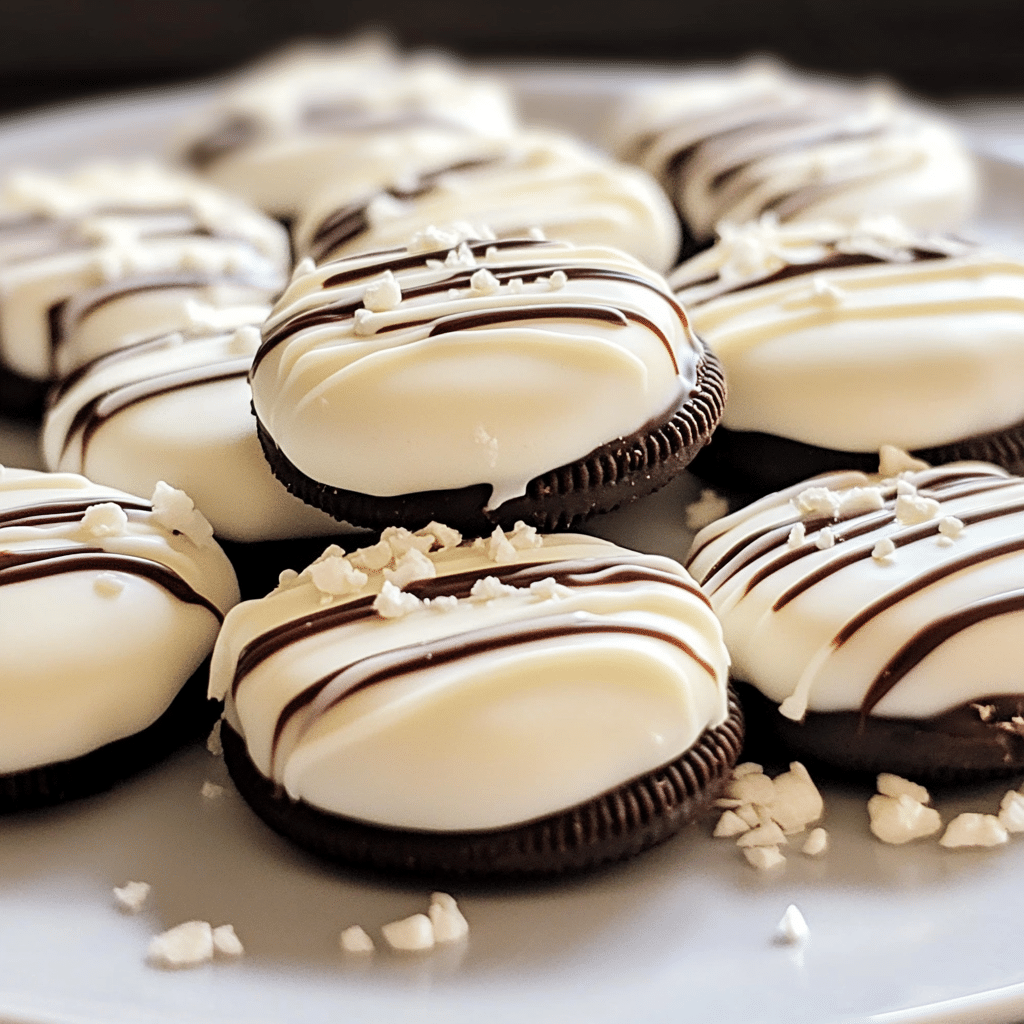
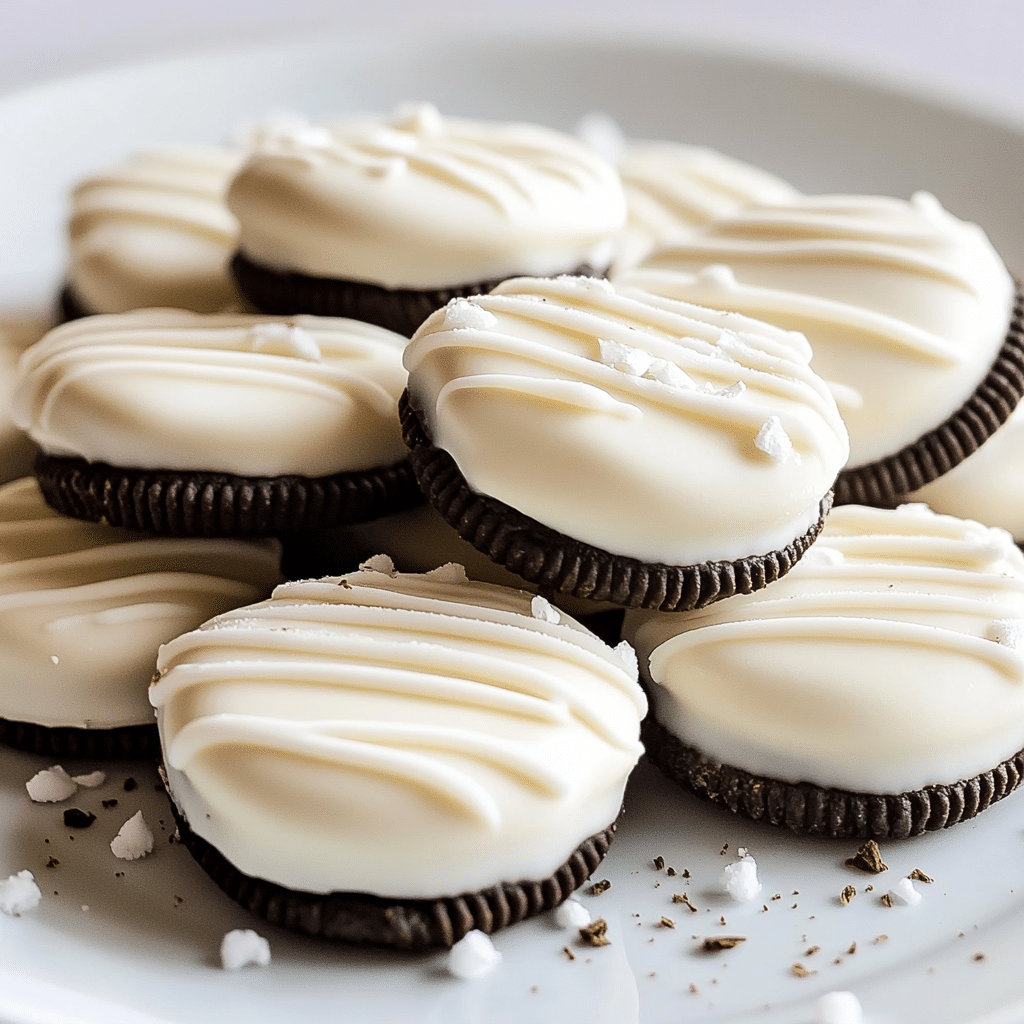
There’s something magical about Oreos, isn’t there? Whether you’re twisting them apart to lick the creamy filling or dunking them in milk, they’re always a favorite. But when you coat them in rich, creamy white chocolate? Well, let’s just say it’s a whole new level of indulgence. These White Chocolate Covered Oreos are the perfect blend of crunch and sweetness—an irresistible bite-sized treat that everyone will love. And the best part? They’re incredibly easy to make!
I first discovered this recipe at a family gathering, where my cousin brought a batch of white chocolate-covered Oreos to the table. The moment I popped one into my mouth, I was hooked! The creamy white chocolate, paired with the crispy Oreo center, was like a party in my mouth. From that day on, they’ve become a go-to treat for birthdays, holiday parties, and just about any occasion. Plus, they’re a hit with kids and adults alike.
Making these White Chocolate Covered Oreos is as simple as it gets, but they look like a million bucks! It’s a no-bake, easy-to-follow recipe that requires just a few ingredients, and you can dress them up however you like. Whether you’re adding sprinkles, a drizzle of melted chocolate, or some crushed candy canes, the possibilities are endless.
So, if you’re craving a sweet treat that’s quick, easy, and guaranteed to impress, let’s dive into this White Chocolate Covered Oreos recipe!
Why You’ll Love This Recipe
I get it—when it comes to sweets, we’re all looking for something that tastes amazing but doesn’t require hours in the kitchen. This recipe is exactly that! Here’s why you’ll fall in love with it:
1. So Easy to Make
You only need three main ingredients: Oreos, white chocolate, and a little bit of time. Seriously, it’s that simple. No complicated techniques or fancy equipment required.
2. Perfect for Any Occasion
Whether you’re hosting a party, gifting a homemade treat, or just craving something sweet for yourself, these White Chocolate Covered Oreos fit the bill. They make great holiday treats, birthday party favors, or just a delicious snack to keep around the house.
3. Customizable and Fun
You can get as creative as you like with this recipe. Add sprinkles, crushed nuts, or even drizzle them with other types of chocolate. The beauty of this recipe is that it’s completely adaptable to your taste and style.
4. Crowd-Pleaser
I’m telling you—everyone loves them. From kids to adults, White Chocolate Covered Oreos are a guaranteed hit at any gathering. They’re small, cute, and incredibly satisfying!
Preparation Time and Servings
- Total Time: 20-30 minutes
- Servings: This recipe yields about 12-15 White Chocolate Covered Oreos, depending on how much chocolate you use and the size of the Oreos.
Nutrition Facts (per Oreo):
- Calories: 200
- Protein: 1g
- Carbs: 28g
- Fat: 10g
- Sugar: 18g
Ingredients
To make these delicious White Chocolate Covered Oreos, here’s what you’ll need:
- 1 pack of Oreo cookies (about 14-15 cookies, depending on the brand)
- 12 oz of white chocolate chips (or chopped white chocolate)
- Sprinkles, crushed nuts, or drizzle chocolate (optional for decoration)
- A pinch of salt (optional, for a sweet-salty flavor)
Why These Ingredients Work:
- Oreo Cookies: Classic and beloved, they’re the perfect base for this treat. Their crunchy texture contrasts beautifully with the creamy chocolate coating.
- White Chocolate: White chocolate brings a smooth, sweet contrast to the deep flavor of the Oreos. It’s the star of this recipe, creating that irresistible coating.
- Optional Decorations: The optional toppings or drizzles make this recipe more fun, customizable, and visually appealing. You can get creative with colors or flavors!
Step-by-Step Instructions
1. Prepare the Workspace
Before diving into making these treats, it’s important to get your workspace ready. Line a baking sheet with parchment paper or wax paper. This will be your “cooling station” for the chocolate-covered Oreos. You’ll need a flat surface to place them once they’re coated.
2. Melt the White Chocolate
Now for the fun part! In a microwave-safe bowl, add your white chocolate chips (or chopped white chocolate). Microwave in 30-second intervals, stirring each time, until the chocolate is fully melted and smooth. This should take about 1-2 minutes, depending on your microwave.
Pro Tip: Be patient with this step! You don’t want to overheat the chocolate and risk it seizing up. Stirring between intervals ensures it melts evenly.
3. Dip the Oreos
Once the white chocolate is melted, it’s time to coat the Oreos! Using a fork or a spoon, carefully dip each Oreo into the melted white chocolate. Make sure to coat it fully, turning the Oreo to get even coverage on all sides.
Tip: If you’re using a spoon, you can use the back of the spoon to smooth the chocolate over the Oreo. Gently tap the spoon on the side of the bowl to remove any excess chocolate.
4. Let the Excess Chocolate Drip Off
Once the Oreo is coated in white chocolate, hold it over the bowl for a second to let any excess chocolate drip off. You can also tap the fork gently on the side of the bowl to get rid of any extra chocolate.
5. Add Decorations
While the white chocolate is still wet, now’s the time to add any sprinkles, crushed candy canes, or drizzle some dark or milk chocolate on top. This step adds a fun pop of color and flavor.
Optional: If you want to get a little fancy, you can drizzle melted dark chocolate over the white chocolate-covered Oreos for a nice contrast in both flavor and appearance.
6. Let the Oreos Set
Now, place the chocolate-covered Oreos on the parchment-lined baking sheet. Allow them to cool and harden for about 20-30 minutes at room temperature. If you’re in a hurry, you can pop them in the fridge for about 10 minutes to speed up the process.
7. Serve and Enjoy
Once the white chocolate is set and hardened, you’re ready to enjoy your homemade treats! You can store them in an airtight container for up to a week—if they last that long!
How to Serve
Here are a few fun serving ideas for your White Chocolate Covered Oreos:
- Gift them: Pack them in a cute box or tin as a homemade gift for a friend or loved one.
- Serve at a party: Place them on a platter as a fun dessert for birthday parties or holiday gatherings.
- Enjoy with a cup of coffee: These treats pair beautifully with your favorite coffee or hot chocolate for a cozy snack.
Additional Tips
- Use Room Temperature Oreos: If you store your Oreos in the fridge, let them come to room temperature before dipping them in chocolate. This ensures the white chocolate sticks better and hardens more evenly.
- Microwave in Short Bursts: When melting the chocolate, microwave in 30-second intervals. Stir each time to prevent overheating. If the chocolate starts to thicken, add a small splash of vegetable oil to thin it out.
- Add Flavor Variations: Spice up your chocolate by adding flavor extracts to the melted white chocolate. Vanilla, almond, or mint extract can give your treats a unique twist.
- Chill the Oreos for Extra Crispness: If you want the Oreos to be extra crispy and crunchier, chill them for a few minutes before dipping them in the white chocolate. This will ensure they don’t get too soggy.
Recipe Variations
- Peanut Butter Oreo Version: Add a layer of creamy peanut butter to the middle of the Oreo before dipping it in white chocolate for a fun twist.
- Gluten-Free Version: Use gluten-free Oreos to make this treat suitable for those with dietary restrictions.
- Holiday-Themed Oreos: Add red, green, or gold sprinkles for a festive look, or dip half of the Oreo in white chocolate and the other half in dark chocolate for a two-tone effect.
Serving Suggestions
Here are some great ways to serve your White Chocolate Covered Oreos:
- Side Dishes: Pair these with a simple fruit salad or whipped cream for a lighter contrast to the sweetness.
- Drinks: These treats go wonderfully with a warm beverage like coffee, hot cocoa, or a cup of tea.
Freezing and Storage
These White Chocolate Covered Oreos store wonderfully!
- Storage: Keep them in an airtight container at room temperature for up to one week.
- Freezing: You can also freeze them! Place the Oreos in a single layer on a baking sheet and freeze until solid. Then, transfer them to a freezer-safe container for up to 2-3 months.
How to Reheat:
To thaw, simply remove from the freezer and let them sit at room temperature for about 15 minutes before serving.
Special Equipment
While you don’t need anything fancy to make these, here are a few tools that will help you:
- Parchment Paper: To prevent sticking and make cleanup easier.
- Microwave-Safe Bowl: For melting the chocolate.
- Fork or Spoon: For dipping the Oreos into the chocolate.
FAQ
Can I use dark chocolate instead of white chocolate? Yes! You can easily swap the white chocolate for dark chocolate or milk chocolate for a different flavor.
Can I add other fillings to the Oreos? Absolutely! Try adding a layer of peanut butter, cream cheese frosting, or even jam in the middle of the Oreos before dipping them in chocolate.
How can I make this recipe ahead? You can make these a day or two ahead and store them in an airtight container. The chocolate-covered Oreos will stay fresh for up to a week.
Can I freeze the uncooked Oreos? Yes, you can freeze the uncoated Oreos and dip them in chocolate at a later date.
Print
White Chocolate Covered Oreos
- Total Time: 30 minutes
Ingredients
- 1 pack of Oreo cookies (about 14–15 cookies, depending on the brand)
- 12 oz of white chocolate chips (or chopped white chocolate)
- Sprinkles, crushed nuts, or drizzle chocolate (optional for decoration)
- A pinch of salt (optional, for a sweet-salty flavor)
Instructions
1. Prepare the Workspace
Before diving into making these treats, it’s important to get your workspace ready. Line a baking sheet with parchment paper or wax paper. This will be your “cooling station” for the chocolate-covered Oreos. You’ll need a flat surface to place them once they’re coated.
2. Melt the White Chocolate
Now for the fun part! In a microwave-safe bowl, add your white chocolate chips (or chopped white chocolate). Microwave in 30-second intervals, stirring each time, until the chocolate is fully melted and smooth. This should take about 1-2 minutes, depending on your microwave.
Pro Tip: Be patient with this step! You don’t want to overheat the chocolate and risk it seizing up. Stirring between intervals ensures it melts evenly.
3. Dip the Oreos
Once the white chocolate is melted, it’s time to coat the Oreos! Using a fork or a spoon, carefully dip each Oreo into the melted white chocolate. Make sure to coat it fully, turning the Oreo to get even coverage on all sides.
Tip: If you’re using a spoon, you can use the back of the spoon to smooth the chocolate over the Oreo. Gently tap the spoon on the side of the bowl to remove any excess chocolate.
4. Let the Excess Chocolate Drip Off
Once the Oreo is coated in white chocolate, hold it over the bowl for a second to let any excess chocolate drip off. You can also tap the fork gently on the side of the bowl to get rid of any extra chocolate.
5. Add Decorations
While the white chocolate is still wet, now’s the time to add any sprinkles, crushed candy canes, or drizzle some dark or milk chocolate on top. This step adds a fun pop of color and flavor.
Optional: If you want to get a little fancy, you can drizzle melted dark chocolate over the white chocolate-covered Oreos for a nice contrast in both flavor and appearance.
6. Let the Oreos Set
Now, place the chocolate-covered Oreos on the parchment-lined baking sheet. Allow them to cool and harden for about 20-30 minutes at room temperature. If you’re in a hurry, you can pop them in the fridge for about 10 minutes to speed up the process.
7. Serve and Enjoy
Once the white chocolate is set and hardened, you’re ready to enjoy your homemade treats! You can store them in an airtight container for up to a week—if they last that long!
Nutrition
- Serving Size: 15
- Calories: 200
- Sugar: 18g
- Fat: 10g
- Carbohydrates: 28g
- Protein: 1g
Conclusion
There you have it—an easy, delicious, and totally customizable treat that will leave everyone coming back for more. I can’t wait to see how your White Chocolate Covered Oreos turn out! Don’t forget to snap a photo and tag me on Instagram—I love seeing your delicious creations!
Enjoy every sweet bite!

