Introduction
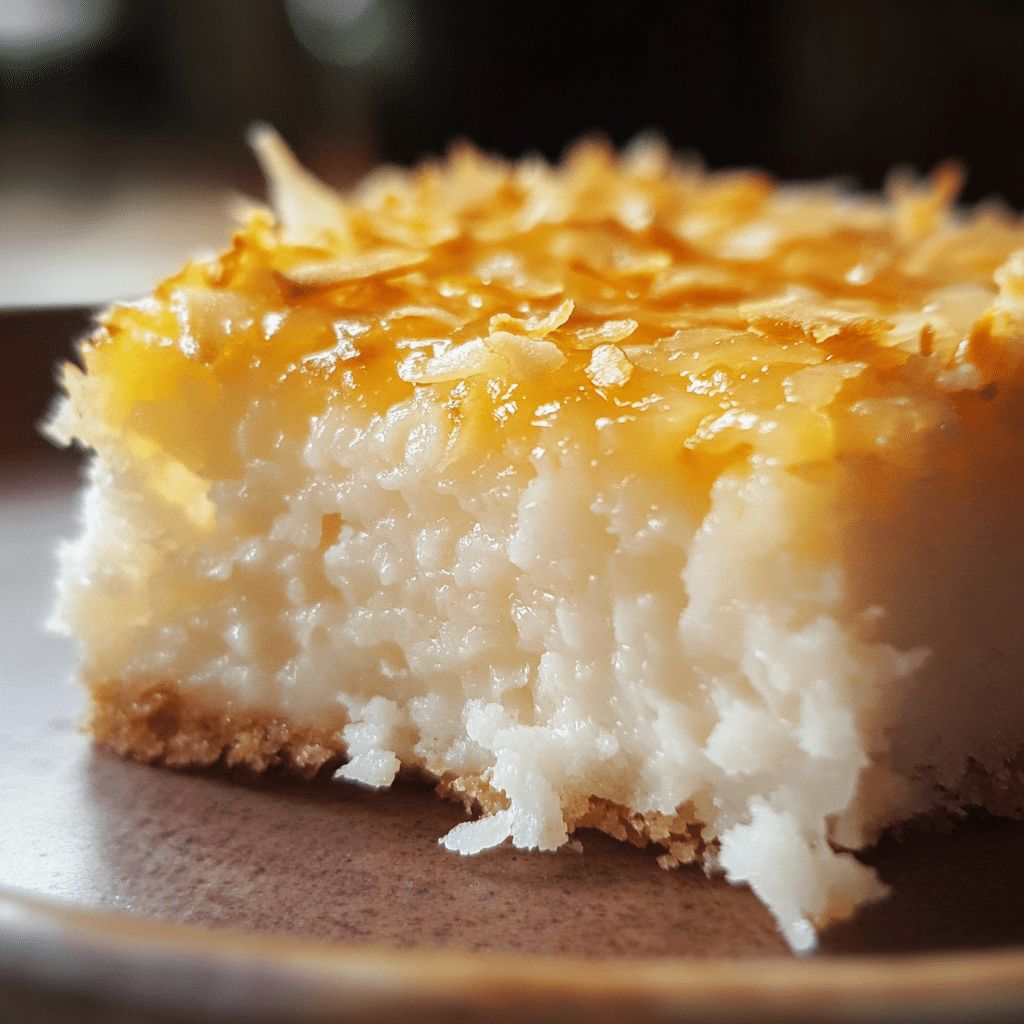
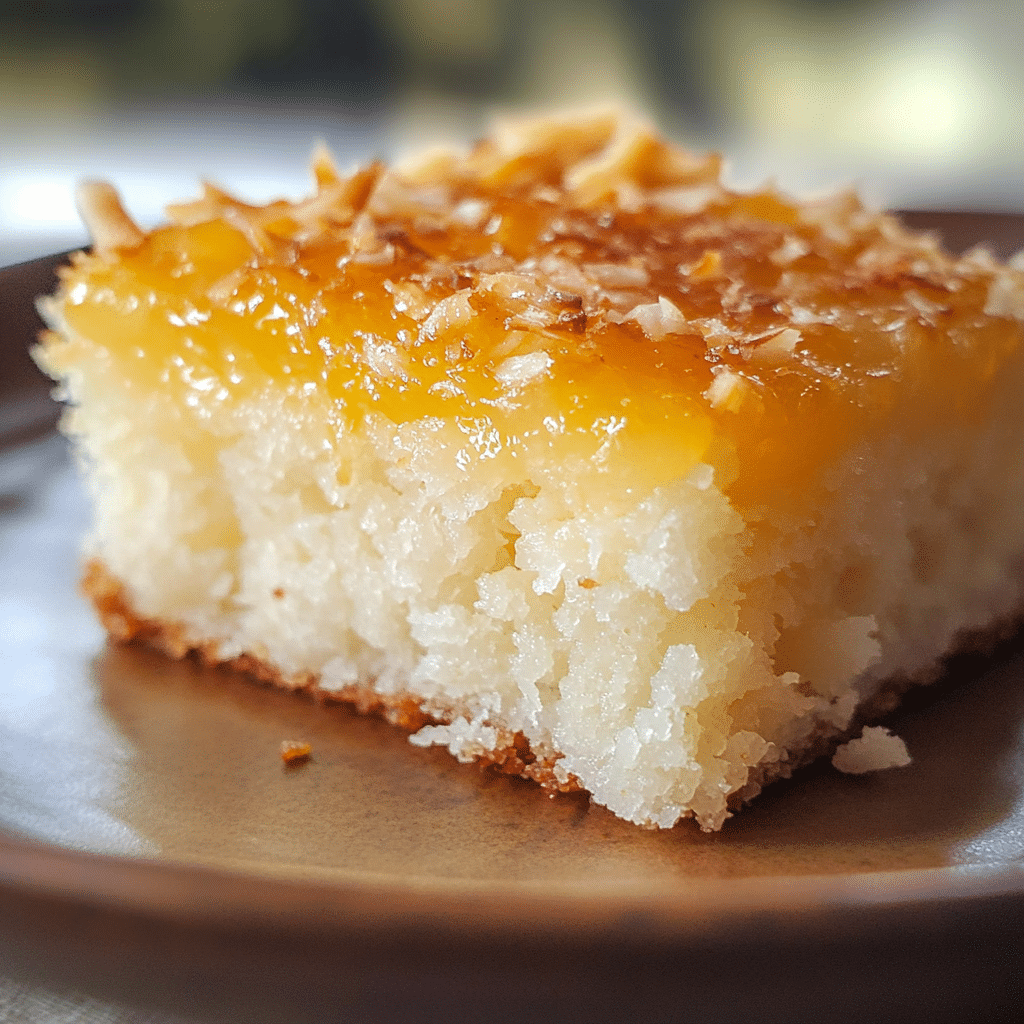
There’s something about coconut cake that instantly makes you feel like you’re on vacation, even if you’re stuck in a cold, rainy afternoon. But not just any coconut cake—this one is sticky in the best way possible. Think soft, fluffy cake with a golden, syrupy coconut glaze that soaks into every inch, creating a cake that’s rich, sweet, and just the right kind of indulgent.
I first stumbled upon this recipe during a trip to the Philippines. Coconut is such a huge part of Filipino cuisine, and when I took a bite of this cake for the first time, I was hooked. The combination of tender cake and the syrupy, sticky topping had me coming back for more. Now, every time I make it, I’m transported back to those sunny days, sitting outside with friends, laughing, and enjoying the simple joy of a homemade dessert.
Whether you’re looking for a dessert to impress at a dinner party or just something to brighten up a rainy day, this sticky coconut cake is sure to become a new favorite. It’s easy to make, but the end result feels extra special—just the way homemade cake should be!
Why You’ll Love This Recipe
- Easy to Make: Despite the mouth-watering look, this cake is simple to prepare. No fancy techniques required, just a few easy-to-follow steps and you’ll have a dessert that’s as impressive as it is delicious.
- Coconut Bliss: If you love coconut, this cake is a dream come true. The coconut flavor is rich and deep, with the shredded coconut giving each bite that wonderful texture.
- Perfect for Any Occasion: Whether you’re hosting a brunch, a birthday party, or just want to treat yourself, this cake fits the bill. It’s not too fussy, but it’s the kind of dessert that everyone will ask for the recipe after tasting.
- Sticky, Sweet, and Irresistible: The sticky coconut glaze that soaks into the cake gives it an irresistible, moist texture. It’s the perfect balance of sweetness and coconut flavor.
Preparation Time and Servings
Total Time: 1 hour 15 minutes (including baking and glazing time)
Servings: This recipe makes about 12 slices of cake.
Nutrition Facts: (per serving)
- Calories: 350
- Protein: 3g
- Carbs: 45g
- Fat: 18g
Ingredients
Cake:
- 1 ½ cups all-purpose flour
- 1 cup granulated sugar
- 1 ½ teaspoons baking powder
- ¼ teaspoon salt
- ½ cup unsalted butter, softened
- 2 large eggs
- 1 cup canned coconut milk
- 1 teaspoon vanilla extract
- ½ cup shredded coconut (sweetened or unsweetened based on your preference)
Sticky Coconut Glaze:
- ½ cup coconut milk (from a can)
- ¾ cup granulated sugar
- 3 tablespoons unsalted butter
- 1 teaspoon vanilla extract
- 1 cup shredded coconut (to sprinkle on top)
The ingredients are simple and straightforward, but they come together to create something extraordinary. The coconut milk gives the cake a creamy, delicate texture, while the shredded coconut adds texture and that unmistakable coconut flavor.
Step-by-Step Instructions
1. Preheat the Oven and Prepare Your Pans
- Start by preheating your oven to 350°F (175°C). Grease a 9-inch round cake pan or an 8×8-inch square pan with butter, and then lightly dust with flour to ensure the cake doesn’t stick.
- If you’re feeling extra fancy, you can line the bottom of the pan with parchment paper for easy removal later.
2. Mix Dry Ingredients
- In a medium-sized bowl, whisk together the flour, sugar, baking powder, and salt. Set this bowl aside for now. The dry ingredients are going to give the cake structure, so don’t skip this step.
3. Cream the Butter and Eggs
- In another large bowl, beat the butter and sugar together using a hand mixer or stand mixer until the mixture becomes light and fluffy. This usually takes about 3-4 minutes.
- Once fluffy, add the eggs, one at a time, mixing well after each addition. The eggs will help give the cake its moist texture.
4. Add the Coconut Milk and Vanilla
- Add the coconut milk and vanilla extract to the wet ingredients, and mix until well combined. You’ll notice the batter becoming a little creamier at this stage—that’s the coconut milk working its magic!
5. Combine Wet and Dry Ingredients
- Gradually add the dry ingredients to the wet mixture, mixing just until combined. You don’t want to overmix here; otherwise, your cake could become tough.
- Stir in the shredded coconut by hand, ensuring it’s evenly distributed through the batter.
6. Bake the Cake
- Pour the batter into your prepared pan, and smooth the top with a spatula. Place it in the preheated oven and bake for 30-35 minutes, or until a toothpick inserted into the center of the cake comes out clean.
- Allow the cake to cool in the pan for 10 minutes before transferring it to a wire rack to cool completely. If you’re in a rush, you can place the cake in the fridge to speed up the cooling process (although the glaze will soak in better if the cake is warm).
7. Make the Sticky Coconut Glaze
- While the cake is cooling, it’s time to prepare the sticky coconut glaze. In a small saucepan, combine coconut milk, sugar, and butter. Heat over medium heat, stirring constantly until the sugar is fully dissolved and the butter is melted.
- Bring the mixture to a simmer and cook for 2-3 minutes, until it thickens slightly.
- Remove from heat and stir in the vanilla extract.
8. Glaze the Cake
- Once the cake has cooled slightly (but is still warm), use a spoon or a brush to generously drizzle the sticky glaze over the top of the cake. Let it soak into the cake, making it extra moist and flavorful.
- Sprinkle the top with extra shredded coconut for that added texture and a beautiful finish.
9. Let the Cake Set
- Allow the cake to sit for about 30 minutes to let the glaze fully soak in. The cake will become even more sticky and delicious as it sits, so don’t rush this step!
How to Serve
This sticky coconut cake is delicious on its own, but here are some ways to make it even more special:
- Serve with a scoop of vanilla ice cream for an indulgent treat.
- Pair with fresh tropical fruits like mango or pineapple for a refreshing contrast to the sweetness of the cake.
- Top with whipped cream and a sprinkle of toasted coconut for extra texture and flavor.
Additional Tips
- Use full-fat coconut milk for the creamiest texture. Light coconut milk doesn’t provide the same richness and will affect the texture of both the cake and the glaze.
- Store-bought shredded coconut can be used, but make sure to choose a high-quality brand for the best flavor.
- If you want the cake to be extra sticky, you can double the glaze recipe and pour more on top after the first layer has soaked in.
- Don’t skip the cooling time: Letting the cake cool for a bit before adding the glaze ensures that the glaze doesn’t just run off—it sinks in and makes the cake perfectly moist.
Recipe Variations
- Chocolate Coconut Cake: Add ¼ cup of cocoa powder to the dry ingredients for a chocolatey twist.
- Lemon Coconut Cake: Add the zest of one lemon to the batter for a fresh citrus flavor that pairs beautifully with coconut.
- Vegan Option: Use coconut oil instead of butter, flax eggs in place of the eggs, and coconut milk for a fully vegan version of this cake.
Serving Suggestions
- Serve with a side of tropical fruit salad to balance out the richness of the cake.
- Pair with iced tea or coconut water for a refreshing, tropical beverage that complements the flavors.
Freezing and Storage
- Storage: Keep leftover cake in an airtight container at room temperature for up to 4 days. The cake tends to stay sticky and moist, making it perfect for a day or two after baking.
- Freezing: To freeze, wrap slices of cake tightly in plastic wrap, then place in a freezer-safe container. You can freeze the cake for up to 3 months. Reheat by letting it thaw at room temperature and giving it a quick zap in the microwave.
Special Equipment
- Cake Pan: Use a 9-inch round cake pan or an 8×8 square pan.
- Saucepan: A small saucepan to prepare the sticky glaze.
- Spatula: For spreading the glaze evenly over the cake.
FAQ Section
Can I use sweetened shredded coconut?
Yes, sweetened shredded coconut works perfectly in this recipe and will add a bit more sweetness. If you prefer a less sweet version, opt for unsweetened coconut.
Can I make this cake ahead of time?
Yes, you can prepare the cake a day in advance. Just be sure to store it in an airtight container, and the glaze will stay deliciously sticky.
How can I make this cake gluten-free?
You can substitute the all-purpose flour with a 1:1 gluten-free flour blend. Just make sure to check the consistency of the batter as it might need slight adjustments.
Sticky Coconut Cake
- Total Time: 1 hour
Ingredients
For the Cake:
- 1 ½ cups all-purpose flour
- 1 cup granulated sugar
- 1 ½ teaspoons baking powder
- ¼ teaspoon salt
- ½ cup unsalted butter, softened
- 2 large eggs
- 1 cup canned coconut milk
- 1 teaspoon vanilla extract
- ½ cup shredded coconut (sweetened or unsweetened based on your preference)
For the Sticky Coconut Glaze:
- ½ cup coconut milk (from a can)
- ¾ cup granulated sugar
- 3 tablespoons unsalted butter
- 1 teaspoon vanilla extract
- 1 cup shredded coconut (to sprinkle on top)
Instructions
1. Preheat the Oven and Prepare Your Pans
- Start by preheating your oven to 350°F (175°C). Grease a 9-inch round cake pan or an 8×8-inch square pan with butter, and then lightly dust with flour to ensure the cake doesn’t stick.
- If you’re feeling extra fancy, you can line the bottom of the pan with parchment paper for easy removal later.
2. Mix Dry Ingredients
- In a medium-sized bowl, whisk together the flour, sugar, baking powder, and salt. Set this bowl aside for now. The dry ingredients are going to give the cake structure, so don’t skip this step.
3. Cream the Butter and Eggs
- In another large bowl, beat the butter and sugar together using a hand mixer or stand mixer until the mixture becomes light and fluffy. This usually takes about 3-4 minutes.
- Once fluffy, add the eggs, one at a time, mixing well after each addition. The eggs will help give the cake its moist texture.
4. Add the Coconut Milk and Vanilla
- Add the coconut milk and vanilla extract to the wet ingredients, and mix until well combined. You’ll notice the batter becoming a little creamier at this stage—that’s the coconut milk working its magic!
5. Combine Wet and Dry Ingredients
- Gradually add the dry ingredients to the wet mixture, mixing just until combined. You don’t want to overmix here; otherwise, your cake could become tough.
- Stir in the shredded coconut by hand, ensuring it’s evenly distributed through the batter.
6. Bake the Cake
- Pour the batter into your prepared pan, and smooth the top with a spatula. Place it in the preheated oven and bake for 30-35 minutes, or until a toothpick inserted into the center of the cake comes out clean.
- Allow the cake to cool in the pan for 10 minutes before transferring it to a wire rack to cool completely. If you’re in a rush, you can place the cake in the fridge to speed up the cooling process (although the glaze will soak in better if the cake is warm).
7. Make the Sticky Coconut Glaze
- While the cake is cooling, it’s time to prepare the sticky coconut glaze. In a small saucepan, combine coconut milk, sugar, and butter. Heat over medium heat, stirring constantly until the sugar is fully dissolved and the butter is melted.
- Bring the mixture to a simmer and cook for 2-3 minutes, until it thickens slightly.
- Remove from heat and stir in the vanilla extract.
8. Glaze the Cake
- Once the cake has cooled slightly (but is still warm), use a spoon or a brush to generously drizzle the sticky glaze over the top of the cake. Let it soak into the cake, making it extra moist and flavorful.
- Sprinkle the top with extra shredded coconut for that added texture and a beautiful finish.
9. Let the Cake Set
- Allow the cake to sit for about 30 minutes to let the glaze fully soak in. The cake will become even more sticky and delicious as it sits, so don’t rush this step!
Nutrition
- Serving Size: 12
- Calories: 350
- Fat: 18g
- Carbohydrates: 45g
- Protein: 3g
Conclusion
I can’t wait to see how your sticky coconut cake turns out! This cake has quickly become one of my favorites—it’s just the right combination of simple ingredients and bold flavors. Don’t forget to tag me on Instagram when you make it; I love seeing your creations! Happy baking, and enjoy every delicious bite!

