Introduction
Let me tell you about my love affair with matcha and chewy desserts. It started when I stumbled upon a quaint Japanese café while traveling. Their desserts were simple yet unforgettable. Among them, matcha mochi brownies stood out: the perfect marriage of earthy matcha and chewy mochi, with just the right amount of sweetness. One bite, and I knew I had to recreate this magic at home.
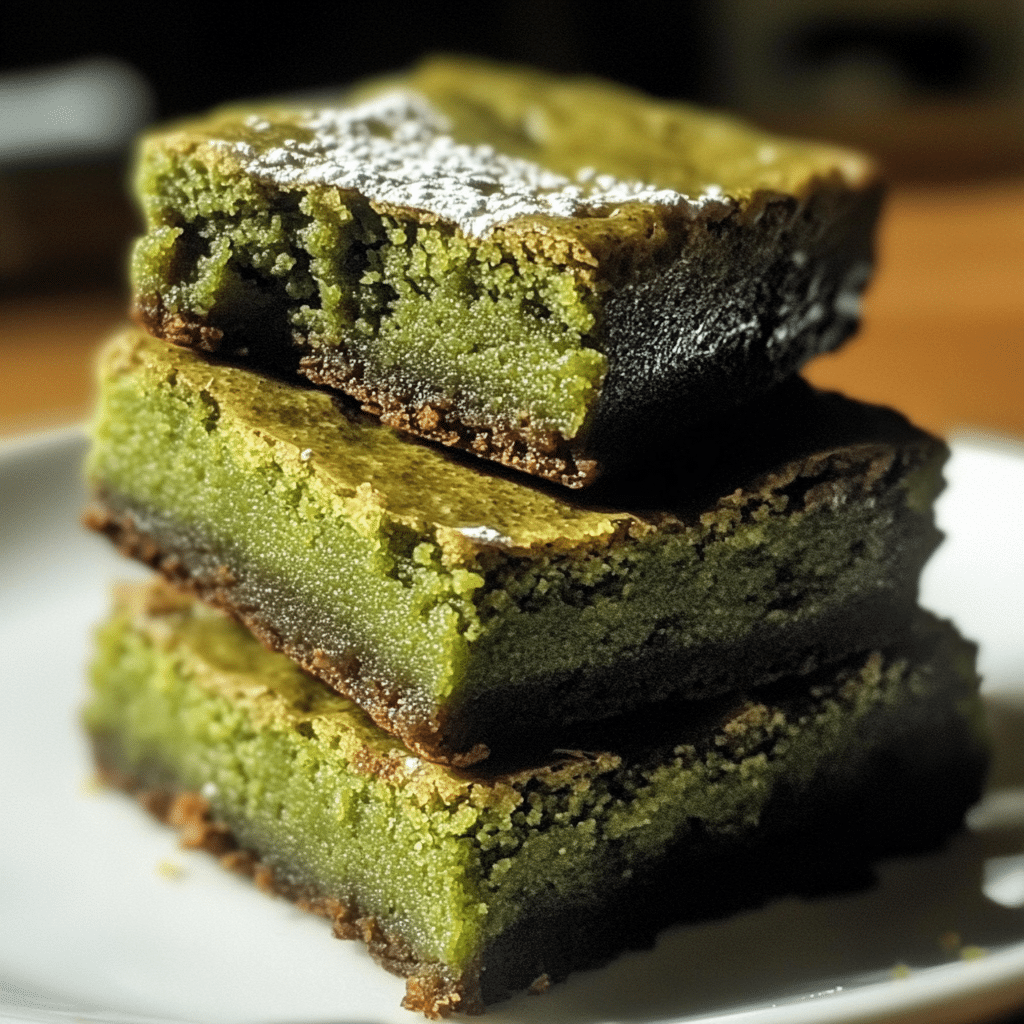
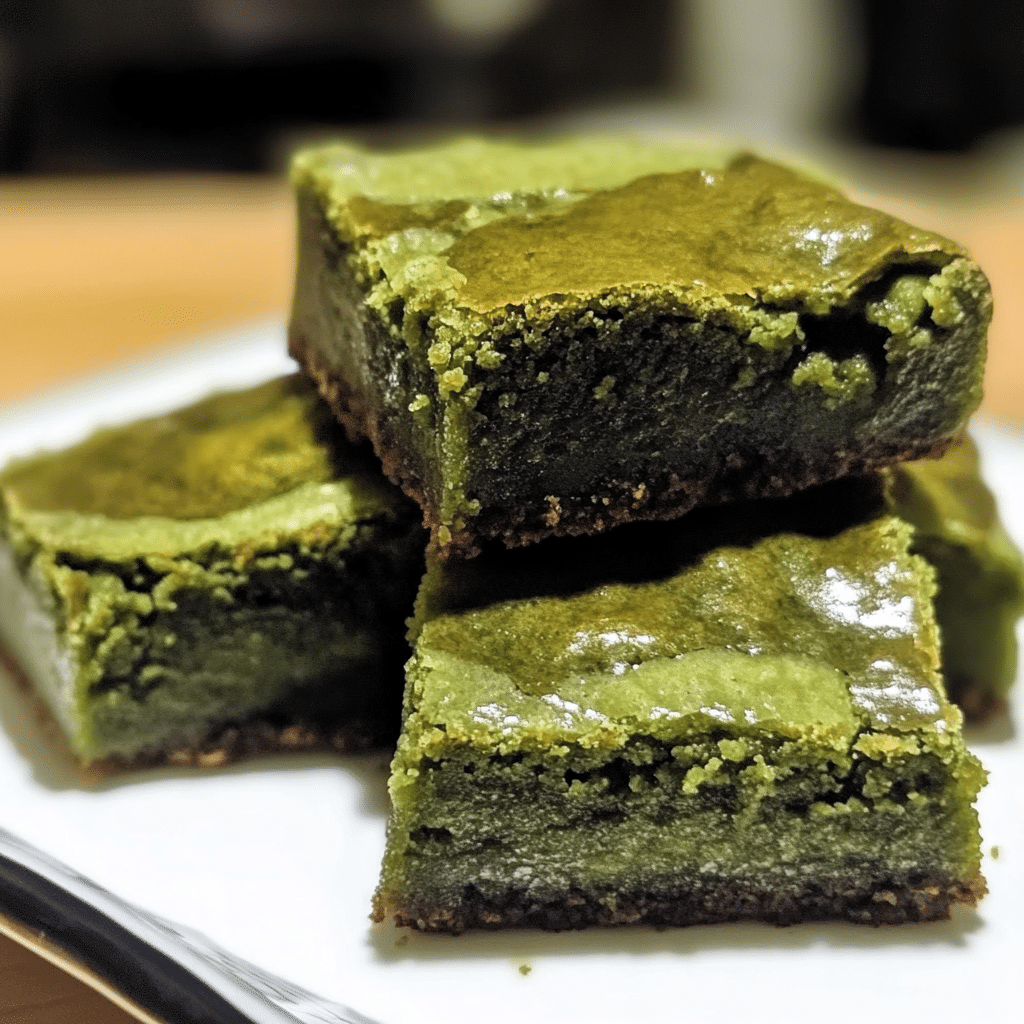
These matcha mochi brownies are a fusion of flavors and textures: the grassy, slightly bitter undertone of matcha, the satisfying chewiness of mochi, and the crisp edges that brownies are famous for. Plus, they’re naturally gluten-free, thanks to sweet rice flour!
Whether you’re a die-hard matcha fan or simply curious to try something new, this recipe is for you. It’s quick to whip up, uses minimal ingredients, and is sure to become your go-to dessert when you’re craving something unique.
Why You’ll Love This Recipe
- Unique Flavor Profile: The rich, earthy taste of matcha pairs beautifully with the sweetness of mochi and the texture of brownies.
- Gluten-Free: Sweet rice flour is naturally gluten-free, making this recipe perfect for everyone.
- Chewy Goodness: These brownies are irresistibly chewy on the inside with a lightly crispy crust.
- Minimal Ingredients: You probably already have most of the ingredients in your pantry.
- Customizable: Want it sweeter? Add white chocolate chips. Prefer a swirl? Mix in some condensed milk or matcha frosting on top.
Preparation Time and Servings
- Total Time: 45 minutes (15 minutes prep, 30 minutes bake)
- Servings: 12 brownies
- Calories: Approx. 160 per brownie (varies based on additions like chocolate chips).
Ingredients
Here’s everything you’ll need for these delightful matcha mochi brownies:
Batter:
- 1 cup sweet rice flour (also called glutinous rice flour)
- 1 ½ tbsp matcha powder (use ceremonial grade for best results)
- ¾ cup granulated sugar
- ½ tsp baking powder
- ¼ tsp salt
- 1 cup coconut milk
- 2 large eggs
- ¼ cup unsalted butter, melted
- 1 tsp vanilla extract
Optional Additions:
- ½ cup white chocolate chips or dark chocolate chips for sweetness
- 2 tbsp sweetened condensed milk for a creamy swirl
Step-by-Step Instructions
1. Preheat and Prep
- Preheat your oven to 350°F (175°C).
- Line an 8×8-inch baking pan with parchment paper, leaving a bit of overhang for easy lifting later. Grease the parchment with a little butter or oil to prevent sticking.
2. Mix Dry Ingredients
- In a large mixing bowl, sift together the sweet rice flour, matcha powder, baking powder, sugar, and salt.
- Whisk to combine thoroughly. The matcha should be evenly distributed for that gorgeous green color.
3. Prepare the Wet Ingredients
- In a separate bowl, whisk together the eggs, coconut milk, vanilla extract, and melted butter.
- Slowly pour the wet ingredients into the dry ingredients, whisking until smooth. The batter will be thick yet pourable, with a slight stickiness from the rice flour.
4. Add Extras (Optional)
- Fold in white chocolate chips or your chosen add-ins at this stage. If you’re using condensed milk, save it for the top swirl.
5. Assemble in the Pan
- Pour the batter into the prepared baking pan, spreading it out evenly with a spatula.
- If adding a condensed milk swirl, drizzle 2-3 tablespoons over the top and use a knife to create a marbled pattern.
6. Bake to Perfection
- Place the pan in the center of your preheated oven and bake for 28-32 minutes. The top should set with a slight sheen, and the edges will pull away slightly from the sides.
- Test for doneness: Insert a toothpick into the center. If it comes out mostly clean with a few sticky crumbs, your brownies are ready!
7. Cool and Slice
- Let the brownies cool in the pan for at least 15 minutes before lifting them out using the parchment overhang.
- Slice into 12 squares. For the cleanest cuts, use a sharp knife dipped in warm water.
How to Serve
Here’s how to enjoy these delightful matcha mochi brownies:
- Warm with Ice Cream: Serve with a scoop of vanilla or matcha ice cream for the ultimate dessert.
- As a Snack: Pair with a cup of hot green tea or iced matcha latte for a matcha lover’s dream combo.
- For Parties: Sprinkle with powdered sugar or drizzle with white chocolate before serving.
Additional Tips
- Choose the Right Matcha: Go for ceremonial-grade matcha for vibrant color and superior flavor. Culinary-grade matcha works too but might taste more bitter.
- Avoid Overbaking: Overbaking will make the brownies dry and less chewy. Keep an eye on them after the 28-minute mark.
- Store Properly: These brownies stay fresh in an airtight container at room temperature for up to 3 days or in the fridge for up to a week.
- Reheat for Best Texture: Microwave leftovers for 10-15 seconds to restore their soft, chewy texture.
- Experiment with Toppings: A sprinkle of toasted sesame seeds or a dusting of powdered sugar can elevate the presentation.
Recipe Variations
- Chocolate Matcha Mochi Brownies: Add 2 tbsp of cocoa powder to the batter for a chocolatey twist.
- Swirled Mochi Brownies: Create a marbled effect with black sesame paste or cream cheese.
- Less Sweet: Use unsweetened coconut milk and reduce sugar to ½ cup for a more subtle sweetness.
- Vegan Option: Replace the eggs with flax eggs (2 tbsp ground flax + 6 tbsp water) and butter with coconut oil.
- Kid-Friendly: Add colorful sprinkles or chocolate chips for a fun, playful touch.
Freezing and Storage
These brownies are excellent for make-ahead treats:
- To Store: Keep them in an airtight container at room temperature for 2-3 days or in the fridge for up to 7 days.
- To Freeze: Wrap individual brownie squares in plastic wrap, then place them in a freezer-safe bag or container. They’ll keep for up to 3 months.
- To Reheat: Microwave frozen brownies for 20-30 seconds or warm them in a 300°F oven for 5-7 minutes.
Special Equipment
- Sifter: Essential for lump-free matcha and even distribution of dry ingredients.
- 8×8 Baking Pan: Perfect size for these brownies. For thinner brownies, use a larger pan.
- Parchment Paper: Makes cleanup easier and ensures the brownies won’t stick to the pan.
FAQ
1. Can I make these brownies less sweet?
Yes! Reduce the sugar to ½ cup and use unsweetened coconut milk.
2. What if I don’t have sweet rice flour?
Unfortunately, regular rice flour won’t give the same chewy texture. Look for brands like Mochiko at Asian grocery stores or online.
3. Can I make this recipe ahead?
Absolutely! The batter can be prepared a day in advance and stored in the fridge. Just bring it to room temperature before baking.
4. Can I double the recipe?
Yes! Use a 9×13-inch pan and increase the baking time to 35-40 minutes.
5. Can I add other flavors or ingredients to the batter?
Absolutely! Feel free to get creative with your additions. White chocolate chips, crushed nuts, or a drizzle of condensed milk on top for extra sweetness can all complement the matcha flavor. You can also try adding a swirl of black sesame paste or cream cheese for an interesting twist.
6. Can I make these brownies less sweet?
Yes! If you prefer a less sweet treat, feel free to reduce the sugar to ½ cup. You can also use unsweetened coconut milk to cut down on sweetness. The matcha flavor will still shine through, and the chewy texture will remain just as delicious!
7.What if I don’t have sweet rice flour?
Sweet rice flour (also known as mochiko) is key to achieving that chewy, mochi-like texture. If you don’t have it, regular rice flour won’t provide the same result, so it’s best to search for sweet rice flour at an Asian grocery store or online. It’s widely available and well worth the effort.
Matcha Mochi Brownies
- Total Time: 45 minutes
Ingredients
For the Batter:
- 1 cup sweet rice flour (also called glutinous rice flour)
- 1 ½ tbsp matcha powder (use ceremonial grade for best results)
- ¾ cup granulated sugar
- ½ tsp baking powder
- ¼ tsp salt
- 1 cup coconut milk
- 2 large eggs
- ¼ cup unsalted butter, melted
- 1 tsp vanilla extract
Optional Additions:
- ½ cup white chocolate chips or dark chocolate chips for sweetness
- 2 tbsp sweetened condensed milk for a creamy swirl
Instructions
1. Preheat and Prep
- Preheat your oven to 350°F (175°C).
- Line an 8×8-inch baking pan with parchment paper, leaving a bit of overhang for easy lifting later. Grease the parchment with a little butter or oil to prevent sticking.
2. Mix Dry Ingredients
- In a large mixing bowl, sift together the sweet rice flour, matcha powder, baking powder, sugar, and salt.
- Whisk to combine thoroughly. The matcha should be evenly distributed for that gorgeous green color.
3. Prepare the Wet Ingredients
- In a separate bowl, whisk together the eggs, coconut milk, vanilla extract, and melted butter.
- Slowly pour the wet ingredients into the dry ingredients, whisking until smooth. The batter will be thick yet pourable, with a slight stickiness from the rice flour.
4. Add Extras (Optional)
- Fold in white chocolate chips or your chosen add-ins at this stage. If you’re using condensed milk, save it for the top swirl.
5. Assemble in the Pan
- Pour the batter into the prepared baking pan, spreading it out evenly with a spatula.
- If adding a condensed milk swirl, drizzle 2-3 tablespoons over the top and use a knife to create a marbled pattern.
6. Bake to Perfection
- Place the pan in the center of your preheated oven and bake for 28-32 minutes. The top should set with a slight sheen, and the edges will pull away slightly from the sides.
- Test for doneness: Insert a toothpick into the center. If it comes out mostly clean with a few sticky crumbs, your brownies are ready!
7. Cool and Slice
- Let the brownies cool in the pan for at least 15 minutes before lifting them out using the parchment overhang.
- Slice into 12 squares. For the cleanest cuts, use a sharp knife dipped in warm water.
Nutrition
- Serving Size: 12
- Calories: 160
Conclusion
There you have it—Matcha Mochi Brownies that are easy to make, irresistibly chewy, and packed with the earthy goodness of matcha. Whether you’re new to matcha or a longtime fan, this recipe is a must-try. Perfect for sharing (or not!), these brownies are guaranteed to impress family and friends.’
And there you have it—delicious Matcha Mochi Brownies that are the perfect blend of chewy, sweet, and earthy goodness. Whether you’re a matcha aficionado or someone looking to explore new flavors, these brownies are bound to become a favorite in your baking repertoire.
Not only do they taste incredible, but they’re also a visual treat with their vibrant green matcha color and chewy texture that’s unlike any other brownie you’ve tried. Plus, they’re naturally gluten-free, making them a wonderful option for those with dietary restrictions.
I can’t wait to hear how your matcha mochi brownies turn out! Be sure to snap a picture and tag me on social media—your creations always brighten my day. Leave a comment below with your thoughts or any variations you tried.
I’d love to hear how your matcha mochi brownies turn out! Snap a photo and tag me on social media—your creations always make my day. Don’t forget to leave a comment below with your tips, tweaks, or just to share the love.

