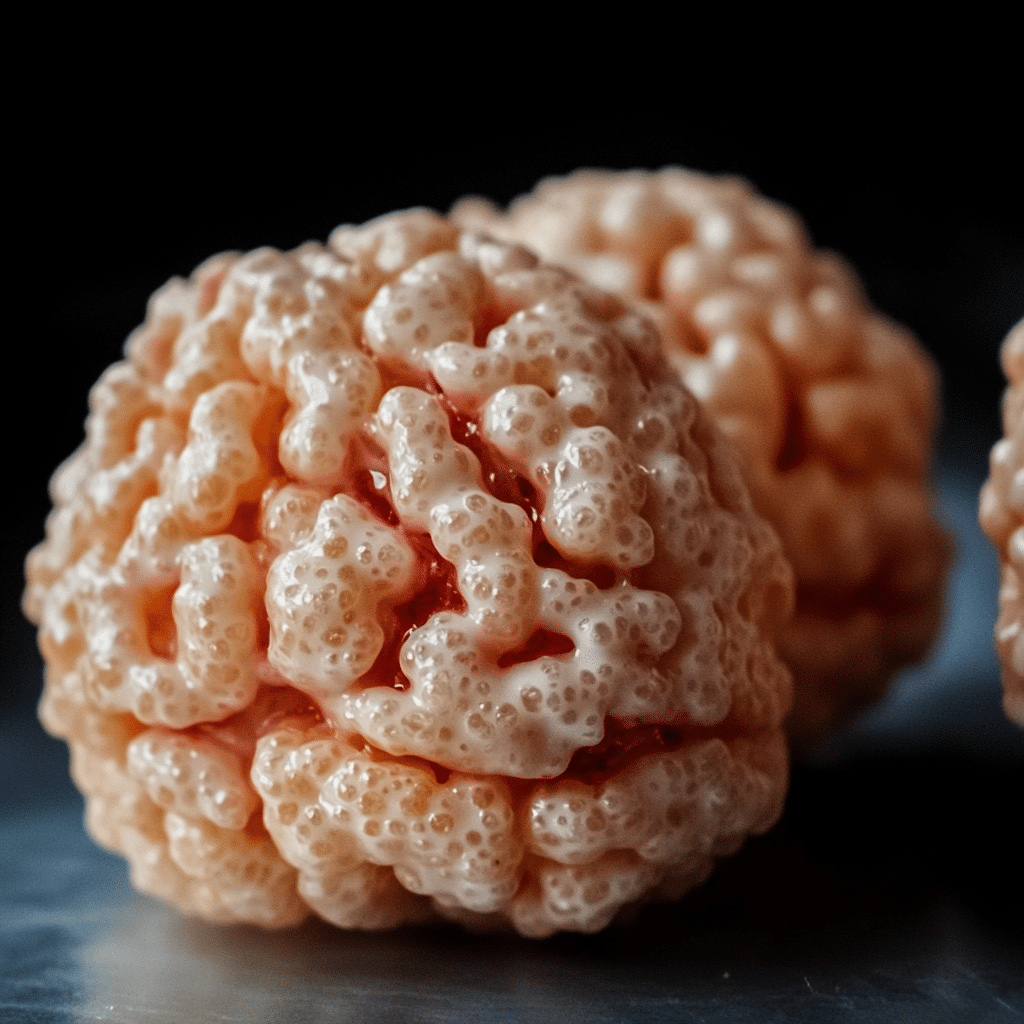
If you’re looking for a fun and spooky Halloween treat that’s easy to make and deliciously sweet, these Marshmallow Rice Krispies Halloween Brains are just the thing! Perfect for parties, school events, or simply for some festive fun at home, these creepy yet tasty “brains” are sure to be a hit with kids and adults alike. With just a few simple ingredients, you can transform classic Rice Krispies treats into gooey, brain-shaped snacks that fit right into the Halloween spirit.
Whether you want to make your Halloween party extra eerie or just need a quick treat to entertain the little ones, these brains are perfect. Plus, they’re fun to decorate, so feel free to get creative and add some creepy embellishments!
Why You’ll Love This Recipe
- Easy to Make: This no-bake recipe comes together in minutes. You’ll only need a few ingredients, and the results are always impressive.
- Festive Fun: Shaped to look like brains, these Rice Krispies treats are perfect for adding a spooky touch to your Halloween celebrations.
- Classic Flavor: With the familiar marshmallow and cereal crunch, these brains are just as tasty as the original Rice Krispies treats we all love, but with a fun Halloween twist!
- Kid-Friendly: Not only do kids love eating these, but they also love making them. Let them help with the shaping and decorating for a fun kitchen activity.
Preparation Time and Servings
- Prep Time: 15 minutes
- Total Time: 30 minutes (includes shaping and setting time)
- Servings: Makes about 10-12 brain-shaped treats
Ingredients
- 6 cups Rice Krispies cereal
- 1 (10 oz) bag mini marshmallows
- 3 tbsp unsalted butter
- Red or pink food coloring (for that brain-like color)
- Cooking spray or butter (for greasing hands)
- Candy eyes or red icing gel (optional for decoration)
Ingredient Breakdown:
- Rice Krispies Cereal: The foundation of these treats, giving them that light, crispy texture.
- Mini Marshmallows: These melt to form the sticky glue that holds the Rice Krispies together, making the treats soft and chewy.
- Butter: Adds richness and helps the marshmallows melt smoothly.
- Food Coloring: A few drops of red or pink food coloring turns these treats into creepy, brain-like creations—perfect for Halloween.
- Decorations: Candy eyes, red icing gel, or even colored sprinkles can add an extra spooky flair to these brains.
Step-by-Step Instructions
Step 1: Melt the Butter and Marshmallows
- Start by melting the butter in a large saucepan over medium heat. Once the butter is melted, add the mini marshmallows and stir constantly until they are fully melted and smooth. Remove the pan from heat.
Step 2: Add Food Coloring
- Stir in a few drops of red or pink food coloring into the melted marshmallow mixture. Mix until the color is uniform. You want to aim for a light pink or reddish hue to mimic the look of brains. Add more coloring as needed to reach your desired shade.
Step 3: Mix in the Rice Krispies
- Add the Rice Krispies cereal to the marshmallow mixture and stir until all the cereal is fully coated in the marshmallow. Make sure the mixture is evenly combined so every bite is gooey and delicious.
Step 4: Shape the Brains
- Let the mixture cool slightly, just enough so it’s easier to handle but still warm and moldable. Lightly grease your hands with butter or cooking spray, then scoop out a handful of the Rice Krispies mixture. Shape it into a rough oval, flattening slightly to resemble the shape of a brain.
- For a more realistic look, use your fingers or the back of a spoon to create small indentations or grooves on the surface of each brain, mimicking the folds and ridges of a real brain.
Step 5: Decorate the Brains (Optional)
- If you want to make these even spookier, add candy eyes to the brains or drizzle red icing gel over them to give them a bloodied appearance. You can also use black decorating gel to draw lines or patterns for added effect.
Step 6: Let Them Set
- Place the brains on a parchment-lined baking sheet and allow them to set at room temperature for about 15-20 minutes, or until they hold their shape. Once set, they’re ready to serve!
How to Serve
These Marshmallow Rice Krispies Halloween Brains are perfect for any Halloween celebration. Here are a few serving ideas:
- Party Platter: Arrange them on a Halloween-themed plate with other spooky treats, like gummy worms or chocolate eyeballs.
- Treat Bags: Wrap each brain in plastic wrap or place them in individual treat bags for a fun party favor.
- Halloween Dessert Table: Add them to your dessert table for a playful and festive Halloween touch.
Additional Tips for Success
- Grease Your Hands: The marshmallow mixture is sticky, so lightly grease your hands with butter or non-stick spray to make shaping the brains easier.
- Work Quickly: The marshmallow mixture will firm up as it cools, so shape the brains while the mixture is still warm and pliable.
- Create More Detail: For an extra realistic touch, use a toothpick or knife to add small lines or grooves to mimic the brain’s folds.
- Use Candy Decorations: Candy eyes or other spooky decorations add a fun and creepy touch to these treats, making them even more festive.
- Chill for Firmer Brains: If you want firmer, more defined shapes, place the treats in the fridge for 10-15 minutes after shaping.
Recipe Variations
- Green Zombie Brains: Add green food coloring to create zombie brains instead of pink or red ones. These look super creepy and are fun to decorate with candy eyes and black icing.
- Chocolate Rice Krispies Brains: For a chocolatey version, add 1/2 cup of cocoa powder to the marshmallow mixture before adding the cereal. You can also drizzle melted chocolate over the finished brains for extra sweetness.
- Peanut Butter Brains: Mix 1/2 cup of peanut butter into the melted marshmallow mixture for a nutty twist on the classic Rice Krispies treat.
- Vegan Version: Use vegan marshmallows and plant-based butter to make this recipe vegan-friendly.
Freezing and Storage
- Storage: These brains can be stored in an airtight container at room temperature for up to 3 days. Just be sure to layer them with parchment paper to prevent them from sticking together.
- Freezing: If you want to make these ahead of time, freeze them individually wrapped in plastic wrap. Store in a freezer-safe bag for up to one month. Thaw at room temperature before serving.
Special Equipment
- Large Saucepan: You’ll need a large saucepan for melting the marshmallows and stirring in the cereal.
- Parchment Paper: Lining your baking sheet with parchment paper helps prevent the treats from sticking as they set.
- Candy Eyes or Icing: These are optional but fun additions for decorating your spooky Rice Krispies brains.
FAQ
- Can I make these ahead of time?: Yes! These treats are perfect for making ahead. Just store them in an airtight container at room temperature until you’re ready to serve.
- Can I use large marshmallows instead of mini marshmallows?: Absolutely. You can use large marshmallows if that’s what you have on hand—just be sure to use the same weight (10 oz) and melt them slowly for even results.
- Can I use other cereals?: While Rice Krispies are the classic choice, you can try other crispy cereals like Cocoa Krispies or Fruity Pebbles for a fun twist.
These Marshmallow Rice Krispies Halloween Brains are guaranteed to be a crowd-pleaser at any Halloween celebration. With their fun shape, delicious flavor, and spooky decorations, they’ll be the talk of the party! Don’t forget to share pictures of your creepy creations—you’ll love how much fun these are to make and eat! Happy Halloween!
Print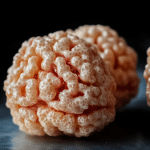
Marshmallow Rice Krispies (Bubbles) Halloween Brains
- Total Time: 20 minutes
Description
This Halloween, I wanted to try something fun and spooky for the kids, and I stumbled upon the idea of making Marshmallow Rice Krispies (Bubbles) Halloween Brains. The name alone had the kids excited, but when they finally saw those gooey, sticky, delicious brains, it became an instant hit! My family absolutely loved them—both the spooky look and the chewy, marshmallowy goodness. Even my husband, who usually prefers more “grown-up” desserts, couldn’t resist taking a second helping. The best part? They were so easy to make! This recipe is perfect if you want something festive but stress-free for Halloween. It’s ideal for parties, movie nights, or just to surprise the family with a spooky treat.
Ingredients
To make these creepy and fun Halloween Brain treats, you’ll need just a few simple ingredients:
- 6 cups Rice Krispies cereal (or any puffed rice cereal)
- 1 package (10 oz) mini marshmallows
- 3 tablespoons butter
- Red food coloring (gel works best for an intense color)
- Candy eyeballs (optional, for extra creepiness)
Instructions
Instructions
- Melt the butter: In a large pot, melt the butter over medium heat. Stir constantly to prevent it from burning.
- Add marshmallows: Once the butter is fully melted, add the marshmallows. Stir continuously until they melt into a smooth mixture.
- Mix in the food coloring: Once the marshmallows are melted, add a few drops of red food coloring. Stir until the mixture turns a creepy, brain-like pink color. Add more color if needed.
- Combine with Rice Krispies: Turn off the heat and slowly fold the Rice Krispies into the marshmallow mixture. Keep stirring until everything is evenly coated.
- Shape the brains: While the mixture is still warm, grease your hands with a little butter and start shaping the mixture into brain shapes. You can use a brain mold if you have one or just form them with your hands.
- Add candy eyes (optional): For extra fun, press candy eyeballs into the “brains” to make them look even spookier.
- Let them set: Allow the brains to cool and set on a lined baking sheet for about 30 minutes.
Notes
- Use gel food coloring: It’s more vibrant and gives you that deep red “brain” color without diluting the marshmallow mixture.
- Grease your hands: Shaping the brains can get sticky, so keep a little butter or cooking spray on your hands to prevent sticking.
- Work quickly: Once the marshmallow mixture starts to cool, it becomes harder to shape. Be ready to move fast!
- Add candy eyes: If you want to make the brains extra spooky, press candy eyeballs into the tops before the mixture sets.
- Flavor variations: If you want to amp up the flavor, add a teaspoon of vanilla extract to the marshmallow mixture.
- Prep Time: 10 minutes
- Cook Time: 10 minutes
Nutrition
- Serving Size: 12
- Calories: 120

