Introduction
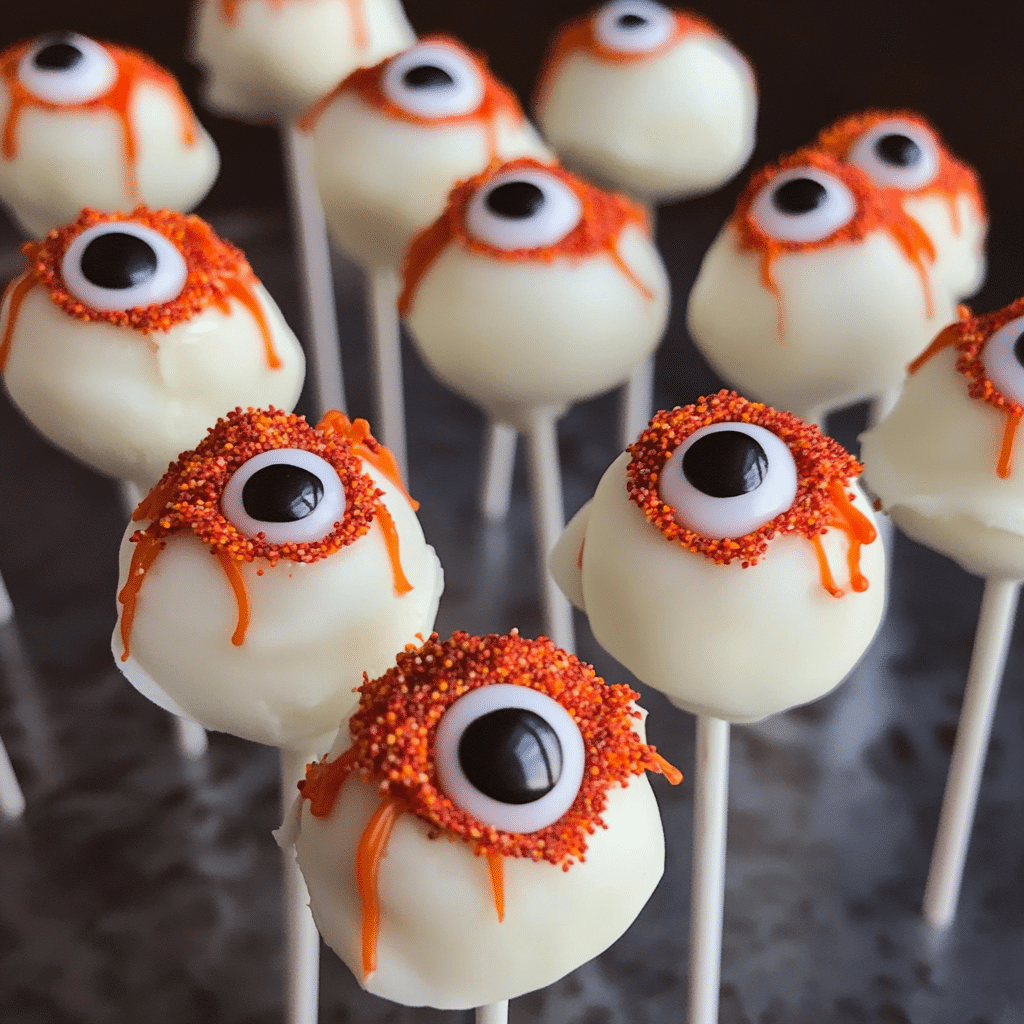
Halloween is that one magical time of year when creepy, spooky, and delicious all come together in the most fun and creative ways especially with Halloween Eyeball Cake pops. And what better way to celebrate than with these absolutely adorable (and slightly spooky) Halloween Eyeball Cake Pops? Whether you’re throwing a Halloween party, hosting a movie night, or just looking for a fun activity with the kids, these cake pops are the perfect treat.
I first made these a few years ago when I wanted a Halloween dessert that wasn’t too scary for the little ones but still had that fun, spooky vibe. Let me tell you, they were a hit! There’s something about a cake pop on a stick that makes everyone—kids and adults alike—smile. And when you add a little eyeball decoration? Well, that just takes them to a whole new level of Halloween fun!
What I love most about these cake pops is how customizable they are. You can use your favorite cake flavor, experiment with different colors for the “iris,” and even get creative with the “veins” for an extra spooky touch. Plus, the process of making cake pops is a lot easier than it seems, and I’m here to walk you through it, step by step. So let’s get baking and turn some cake into creepy-cute eyeball pops!
Why You’ll Love This Recipe
There so many reason to love this Halloween Eyeball Cake pops:
- Easy to Make: Even if you’re new to cake pops, don’t worry! This recipe is beginner-friendly, and I’ll guide you through every step. The trickiest part is dipping the pops in chocolate, but I have tips to make it smooth and mess-free.
- Perfect for Halloween Parties: These cake pops are sure to steal the show at any Halloween gathering. The spooky eyeball design is a crowd-pleaser, and they’re just the right size for party treats.
- Kid-Friendly Fun: Let the kids join in on the decorating! They’ll have a blast helping to dip the cake balls in chocolate and adding the fun, googly candy eyes. It’s a great way to get them involved in the kitchen.
- Flavor-Packed: You can make these cake pops with any flavor of cake you like—vanilla, chocolate, red velvet, you name it. The candy coating adds a delicious crunch, and the combination of soft cake and a crispy exterior is just divine.
- Spooky and Cute: These cake pops are creepy enough to fit the Halloween theme but cute enough not to scare away the little ones. Plus, who doesn’t love an edible eyeball?
Preparation Time and Servings
- Total Time: 2 hours (including cooling and decorating)
- Prep Time: 1 hour
- Cook Time: 30 minutes
- Cooling Time: 30 minutes
- Servings: Makes approximately 20-24 cake pops
- Calories per Serving: 150-180 calories per cake pop
Ingredients
To create these delightful Halloween Eyeball Cake pops, you’ll need:
Cake
- 1 box of your favorite cake mix (chocolate, vanilla, or red velvet work great)
- Ingredients required by the cake mix (eggs, oil, water)
Frosting (or use store-bought)
- ½ cup unsalted butter, softened
- 2 cups powdered sugar
- 2-3 tablespoons milk
- 1 teaspoon vanilla extract
Decorations
- 16 oz white candy melts (for the outer coating)
- 2-3 tablespoons vegetable shortening (optional, for thinning the candy melts)
- 20-24 lollipop sticks
- Candy eyes (or edible googly eyes)
- Red food coloring gel (for the veins)
- Gel icing or candy melts in various colors for the iris (green, blue, brown)
Optional
- Black candy melts (for the pupils)
- Sprinkles for extra decoration
Step-by-Step Instructions
Here’s how to make your very own Halloween Eyeball Cake pops:
1. Bake the Cake
- Preheat your oven according to the cake mix instructions.
- Prepare the cake mix as directed on the box, using the ingredients listed (typically eggs, oil, and water).
- Pour the batter into a 9×13-inch baking dish and bake until a toothpick inserted into the center comes out clean. This usually takes 25-30 minutes, but be sure to follow your cake mix’s specific instructions.
- Once baked, let the cake cool completely. This step is crucial! If the cake is too warm, it will crumble too easily.
2. Prepare the Frosting
- While the cake is cooling, make your frosting. In a large bowl, beat the softened butter until creamy.
- Gradually add in the powdered sugar, beating continuously. Add 1 tablespoon of milk at a time, adjusting the consistency until it’s smooth and spreadable. Stir in the vanilla extract for flavor.
3. Crumble the Cake
- Once the cake has cooled, crumble it into fine crumbs in a large mixing bowl. You can do this by hand or with a food processor.
- Add about ¾ of the frosting into the cake crumbs and mix until well combined. The mixture should be moist but firm enough to hold its shape. If it’s too dry, add a little more frosting; if it’s too wet, chill it for a few minutes to firm up.
4. Roll Cake Balls
- Using your hands or a small cookie scoop, form the cake mixture into golf ball-sized balls. Place them on a lined baking sheet. You should end up with about 20-24 cake balls.
- Insert a lollipop stick into the center of each cake ball. To help the sticks stay in place, dip the tip of each stick into a bit of melted candy coating before inserting it into the cake ball. This helps “glue” the stick to the cake.
- Place the tray of cake pops in the fridge or freezer for about 20-30 minutes to firm up.
5. Melt the Candy Coating
- While the cake pops are chilling, melt the white candy melts according to the package instructions. You can do this in the microwave in 30-second intervals, stirring in between, until smooth. If the candy melts are too thick, you can add 1-2 tablespoons of vegetable shortening to thin them out.
6. Dip the Cake Pops
- Remove the cake pops from the fridge. Working one at a time, dip each cake pop into the melted candy coating, ensuring it’s fully covered. Gently tap off the excess coating by tapping the stick against the edge of the bowl.
- Place the cake pop upright into a styrofoam block or a cake pop stand to let the coating set. While the coating is still wet, attach a candy eyeball in the center of each cake pop. Repeat for all cake pops.
7. Add Details
- Once the coating has set, it’s time to get creative! Use gel icing or additional colored candy melts to add the iris and pupils to the eyeballs. You can use a piping bag or a toothpick for precision.
- For the veins, dip a fine-tipped brush or toothpick into red food coloring gel, and carefully draw thin, squiggly lines radiating from the center of the eye to the edges. This gives the eyeballs that creepy, bloodshot look!
8. Let Set
- Once decorated, allow the cake pops to set completely before serving. You can speed this process up by placing them in the fridge for 10-15 minutes.
How to Serve
Serve these spooky eyeball cake pops at your Halloween party for a show-stopping treat that’s as fun to look at as it is to eat! Here are some ideas for serving:
- Display them in a festive Halloween-themed stand or prop them in a small pumpkin or foam base.
- Place each cake pop in a clear treat bag tied with orange and black ribbon for a fun party favor.
- Serve them alongside other Halloween treats like candy corn, ghost cupcakes, or spider cookies for a full-on spooky dessert table!
Additional Tips
Here are few tips to ensure Halloween Eyeball Cake pops turns out perfectly every time:
- Chill Your Cake Pops: Always chill your cake balls before dipping them in candy melts. This helps them stay firm and prevents them from falling off the stick when dipped in the warm coating.
- Thinning Candy Melts: If your candy melts are too thick, add 1-2 tablespoons of vegetable shortening to thin them out. This makes for smoother dipping and a more even coating.
- Using Gel Icing: Gel icing can sometimes smudge if not fully set, so let each layer of decoration dry before adding the next detail. This is especially important for the eyes and veins.
- Candy Eyes Alternative: If you don’t have candy eyes, you can make your own by piping small circles of white candy melts, letting them set, then adding a black dot for the pupil.
- Storage: Store your cake pops in an airtight container in the fridge for up to a week. If you’re making them ahead, you can also freeze the undipped cake balls and dip them in candy melts closer to the day of your event.
Recipe Variations
Want to try something different? Here are few variations of this Halloween Eyeball Cake pops recipe you can explore:
- Different Cake Flavors: While this recipe suggests using vanilla, chocolate, or red velvet cake, you can experiment with any flavor you like. Spice cake or pumpkin cake would be perfect for fall!
- Colorful Iris: For extra fun, make eyeballs with different colored irises. Try blue, green, brown, or even purple candy melts for a unique twist.
- Spooky Sprinkles: Instead of drawing veins, use red sprinkles or edible glitter for a sparkly, spooky touch.
- Monster Eyes: Want to make them even scarier? Add a second candy eye to make these into monster eyeballs, or use glow-in-the-dark icing for the veins!
FAQ
1st Step: Can I use homemade cake instead of a cake mix?
Absolutely! If you have a favorite homemade cake recipe, feel free to use it. Just ensure that it’s baked and cooled completely before crumbling. You can also use any flavor you like, such as lemon, almond, or even chocolate chip.
2nd Step: How do I store cake pops?
Store your cake pops in an airtight container in the refrigerator for up to a week. If you need to store them for a longer period, you can freeze the uncoated cake balls. Just make sure to wrap them tightly in plastic wrap before placing them in a freezer-safe container. When you’re ready to decorate, allow them to thaw in the fridge before dipping.
3rd Step: What if my candy melts are too thick?
If your candy melts are too thick for dipping, you can add a little vegetable shortening to help thin them out. Start with a teaspoon and gradually add more until you reach a smooth consistency that’s easy to dip. Make sure to mix thoroughly to avoid clumps.
4th Step: Can I use chocolate instead of candy melts?
Yes, you can use chocolate! Just melt it carefully, as it can be temperamental. Add a bit of shortening to help with the dipping process. However, keep in mind that chocolate may set up differently than candy melts, so you may want to chill the finished pops for a bit longer.
5th Step: How can I make these cake pops vegan or gluten-free?
To make vegan cake pops, use a vegan cake mix and substitute the eggs with applesauce or flaxseed meal. For gluten-free options, look for gluten-free cake mixes available in stores or online. Just ensure that all other ingredients, like candy melts and decorations, are also gluten-free.
6th Step: Can I make these cake pops ahead of time?
Yes! You can prepare the cake pops in advance. They can be made a few days ahead of time and stored in the fridge until you’re ready to serve. If you’re making them well in advance, consider freezing them before decorating to maintain freshness.
7th Step: What’s the best way to transport cake pops?
If you’re taking your cake pops to a party or event, place them upright in a cake pop stand or in a decorated box lined with foam or styrofoam to keep them stable. This prevents them from tipping over and keeps the decorations intact.
8th Step: Can I customize the decorations?
Definitely! The fun part of cake pops is the decoration. You can use any type of candy or icing for the eyeballs and veins. Get creative with colors, shapes, and even textures—think edible glitter, sprinkles, or even fondant shapes for added flair.
9th Step: What can I do if the cake pops fall off the stick?
If your cake pops fall off the stick while dipping, it could be due to them being too warm or not being chilled enough. Make sure to chill them well before dipping. If they fall, you can simply place them back on the stick and re-dip them in the melted candy coating.
10th Step: Can I make these without sticks?
Yes! If you prefer, you can make these as regular cake balls without sticks. Simply form them into balls and dip them in the candy coating. They can be served on a plate or in small paper cups for easier eating.
Print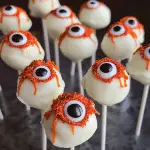
Halloween Eyeball Cakepops
- Total Time: 2 hours
Ingredients
For the Cake
- 1 box of your favorite cake mix (chocolate, vanilla, or red velvet work great)
- Ingredients required by the cake mix (eggs, oil, water)
For the Frosting (or use store-bought)
- ½ cup unsalted butter, softened
- 2 cups powdered sugar
- 2–3 tablespoons milk
- 1 teaspoon vanilla extract
For the Decorations
- 16 oz white candy melts (for the outer coating)
- 2–3 tablespoons vegetable shortening (optional, for thinning the candy melts)
- 20–24 lollipop sticks
- Candy eyes (or edible googly eyes)
- Red food coloring gel (for the veins)
- Gel icing or candy melts in various colors for the iris (green, blue, brown)
Optional
- Black candy melts (for the pupils)
- Sprinkles for extra decoration
Instructions
1. Bake the Cake
- Preheat your oven according to the cake mix instructions.
- Prepare the cake mix as directed on the box, using the ingredients listed (typically eggs, oil, and water).
- Pour the batter into a 9×13-inch baking dish and bake until a toothpick inserted into the center comes out clean. This usually takes 25-30 minutes, but be sure to follow your cake mix’s specific instructions.
- Once baked, let the cake cool completely. This step is crucial! If the cake is too warm, it will crumble too easily.
2. Prepare the Frosting
- While the cake is cooling, make your frosting. In a large bowl, beat the softened butter until creamy.
- Gradually add in the powdered sugar, beating continuously. Add 1 tablespoon of milk at a time, adjusting the consistency until it’s smooth and spreadable. Stir in the vanilla extract for flavor.
3. Crumble the Cake
- Once the cake has cooled, crumble it into fine crumbs in a large mixing bowl. You can do this by hand or with a food processor.
- Add about ¾ of the frosting into the cake crumbs and mix until well combined. The mixture should be moist but firm enough to hold its shape. If it’s too dry, add a little more frosting; if it’s too wet, chill it for a few minutes to firm up.
4. Roll Cake Balls
- Using your hands or a small cookie scoop, form the cake mixture into golf ball-sized balls. Place them on a lined baking sheet. You should end up with about 20-24 cake balls.
- Insert a lollipop stick into the center of each cake ball. To help the sticks stay in place, dip the tip of each stick into a bit of melted candy coating before inserting it into the cake ball. This helps “glue” the stick to the cake.
- Place the tray of cake pops in the fridge or freezer for about 20-30 minutes to firm up.
5. Melt the Candy Coating
- While the cake pops are chilling, melt the white candy melts according to the package instructions. You can do this in the microwave in 30-second intervals, stirring in between, until smooth. If the candy melts are too thick, you can add 1-2 tablespoons of vegetable shortening to thin them out.
6. Dip the Cake Pops
- Remove the cake pops from the fridge. Working one at a time, dip each cake pop into the melted candy coating, ensuring it’s fully covered. Gently tap off the excess coating by tapping the stick against the edge of the bowl.
- Place the cake pop upright into a styrofoam block or a cake pop stand to let the coating set. While the coating is still wet, attach a candy eyeball in the center of each cake pop. Repeat for all cake pops.
7. Add Details
- Once the coating has set, it’s time to get creative! Use gel icing or additional colored candy melts to add the iris and pupils to the eyeballs. You can use a piping bag or a toothpick for precision.
- For the veins, dip a fine-tipped brush or toothpick into red food coloring gel, and carefully draw thin, squiggly lines radiating from the center of the eye to the edges. This gives the eyeballs that creepy, bloodshot look!
8. Let Set
- Once decorated, allow the cake pops to set completely before serving. You can speed this process up by placing them in the fridge for 10-15 minutes.
- Prep Time: 1 hour
- Cook Time: 30 minutes
Nutrition
- Serving Size: 24
- Calories: 180
Conclusion
With this FAQ, you’ll have all the information you need to make the best Halloween Eyeball Cake Pops while addressing common questions. Enjoy your Halloween baking adventure, and let your creativity shine through these spooky treats!

