Introduction
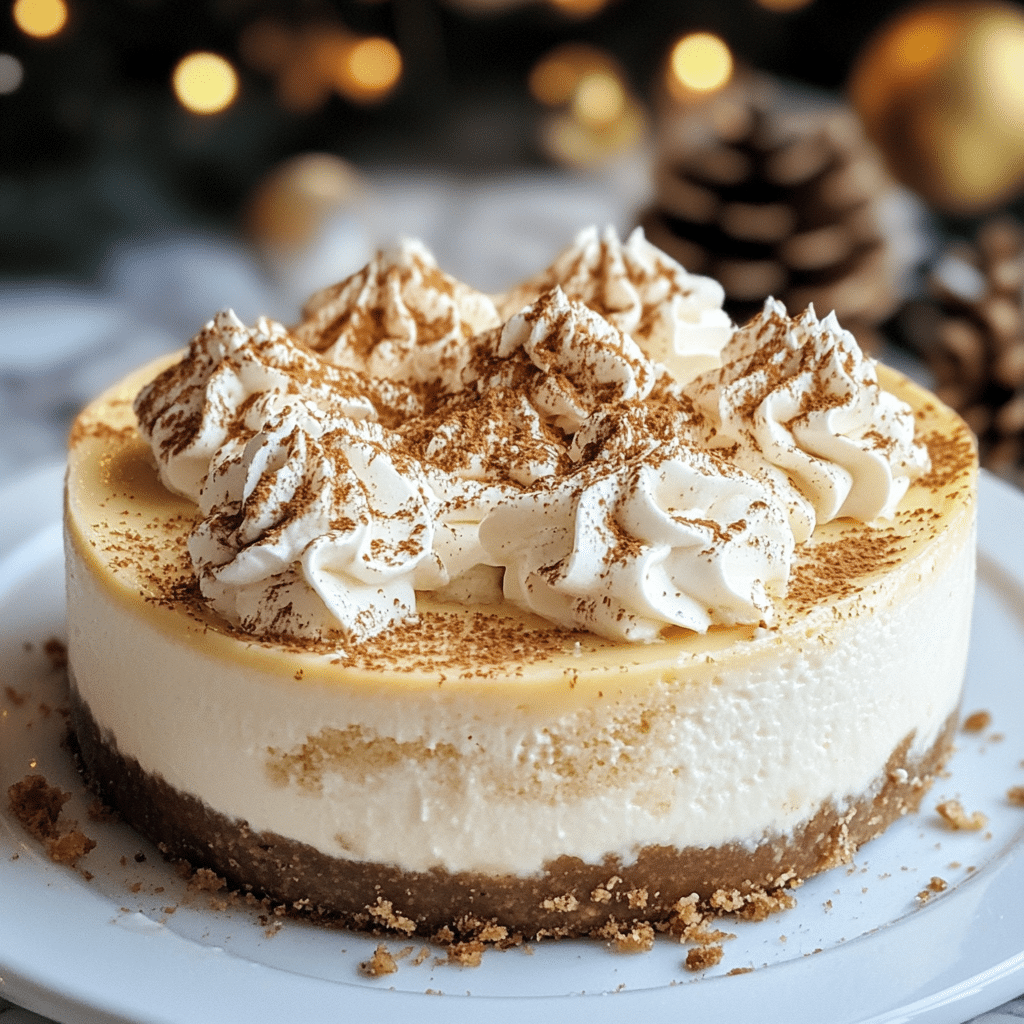
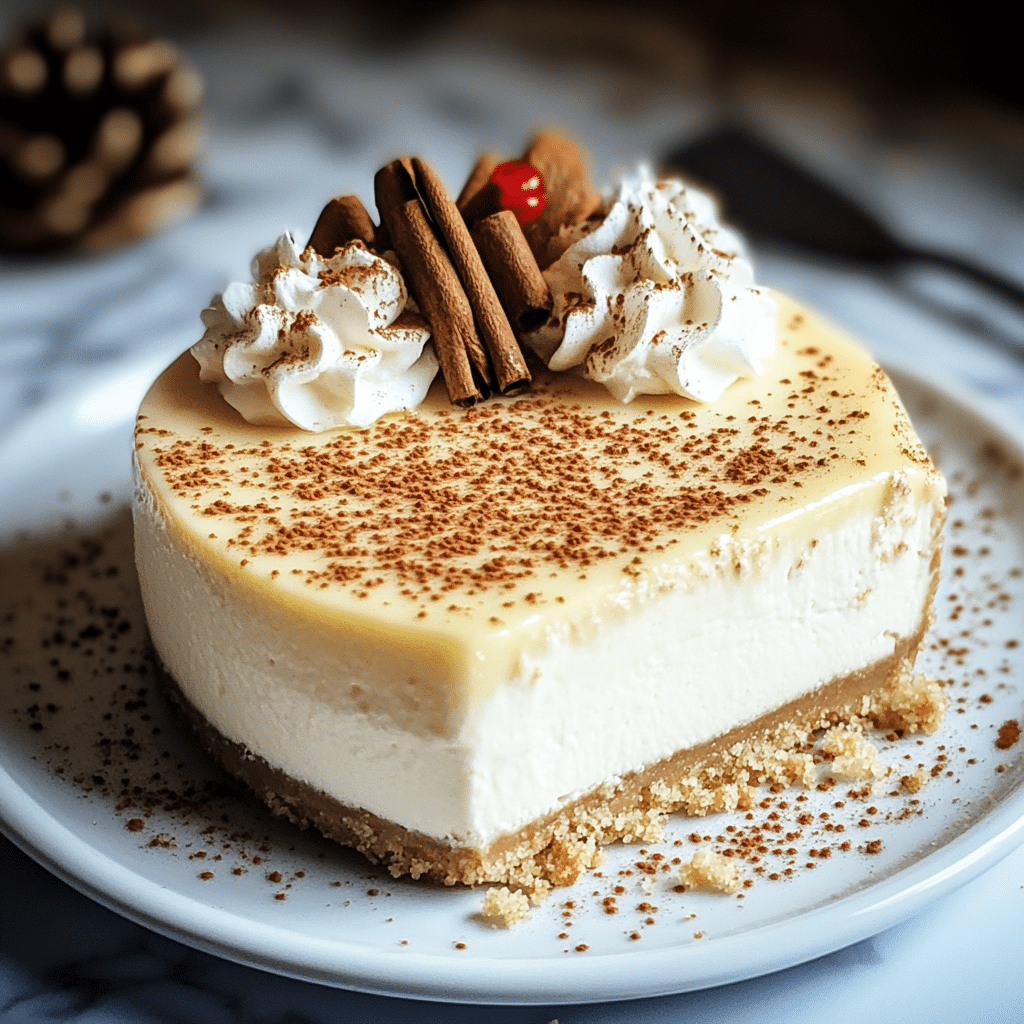
There’s something about the holiday season that just screams for rich, decadent desserts. Eggnog, with its creamy texture and comforting spices, is a holiday classic—and it just happens to be the perfect flavor for a cheesecake. Yes, you heard that right! This Eggnog Cheesecake is a showstopper, and it’s going to steal the spotlight at your holiday table. The smooth, silky filling sits on top of a buttery graham cracker crust, and the whole thing is topped with a dollop of whipped cream and a sprinkle of nutmeg. It’s everything you love about eggnog in the form of a dessert that’s both sophisticated and cozy.
I first came across this recipe a few years ago when I was looking for something different to bring to a family Christmas gathering. We had the usual pumpkin pies, sugar cookies, and cinnamon rolls, but I was craving something a little more indulgent. I decided to give this Eggnog Cheesecake a try, and I’m so glad I did! The creamy texture, the sweet-spicy flavor, and the festive touch from the nutmeg—this cheesecake quickly became my new favorite holiday treat. Not only is it absolutely delicious, but it also looks like you spent hours in the kitchen (when in reality, it’s so easy to make). Perfect for when you want to impress guests without breaking a sweat!
So, if you’re looking to add a special dessert to your holiday menu, this Eggnog Cheesecake is it. Trust me, you’ll be getting compliments on this one for years to come!
Why You’ll Love This Eggnog Cheesecake
Here are a few reasons why this Eggnog Cheesecake will become your new go-to holiday dessert:
- Easy to Make: Don’t be intimidated by cheesecake! This recipe is straightforward, and you don’t need to be a pro in the kitchen to pull it off. You’ll mix up the filling, pour it into a prepared crust, and bake it—simple as that.
- Perfect for the Holidays: The flavor of eggnog is the essence of Christmas. It’s rich, spicy, and creamy, and when paired with a classic cheesecake filling, it’s pure holiday magic. This dessert will instantly transport you to cozy, snowy evenings by the fire.
- Impressive Yet Simple: You don’t need to be an expert baker to create a stunning dessert. The cheesecake looks so elegant, and when topped with freshly whipped cream and a dusting of nutmeg, it’s absolutely beautiful on the table.
- Make-Ahead: The best part? You can make this cheesecake a day or two ahead of time, which means you can enjoy the holiday festivities without stressing about last-minute baking.
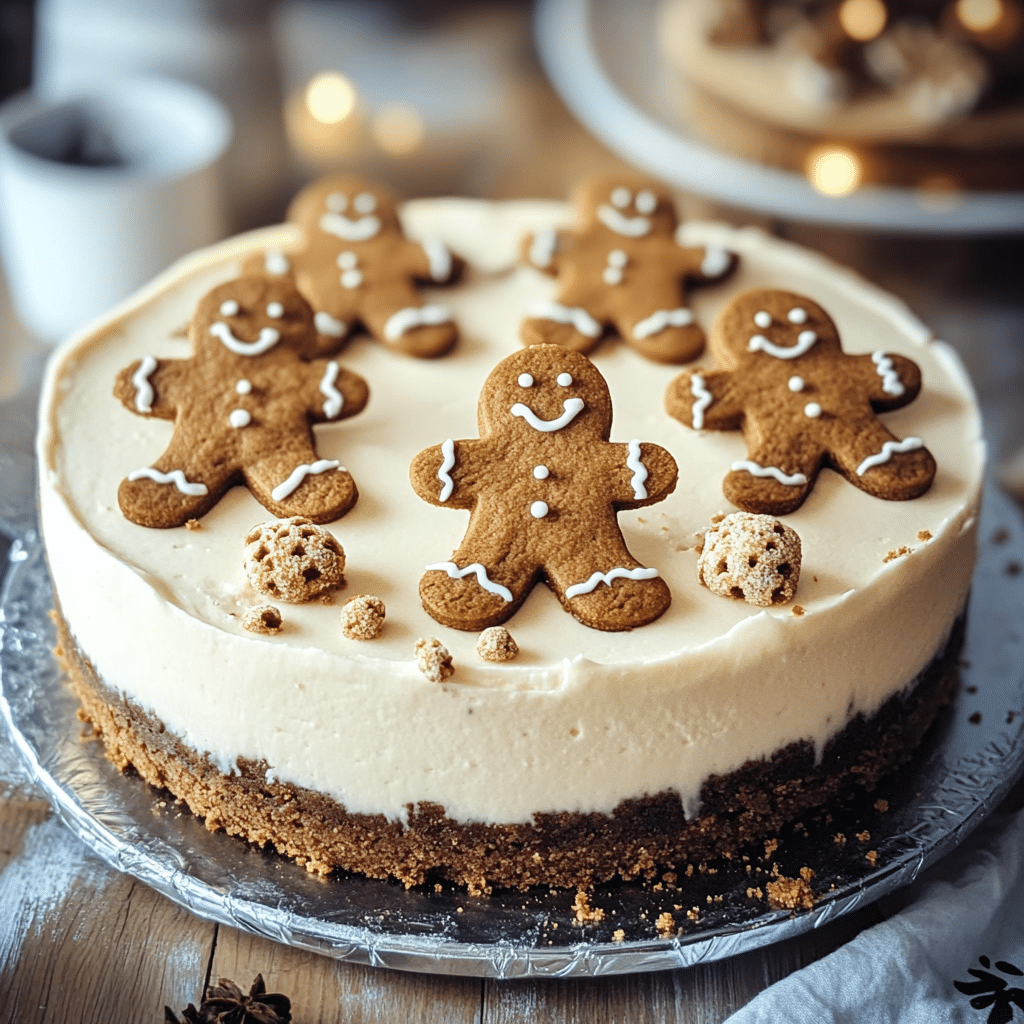
- Customizable: Want to add a little extra spice or flair? This cheesecake is so versatile. Add a splash of rum extract for a deeper eggnog flavor, or top it with crushed gingerbread cookies for a fun twist.
With all these benefits, this Eggnog Cheesecake is sure to win over anyone who’s lucky enough to try it!
Preparation Time and Servings
- Total Time: 4 hours (including cooling time)
- Prep Time: 20 minutes
- Cook Time: 1 hour 15 minutes
- Servings: This recipe makes 8-10 servings, perfect for a holiday gathering with family or friends.
Nutrition Facts (per serving)
- Calories: 350
- Protein: 6g
- Carbs: 30g
- Fat: 24g
- Sugar: 22g
Ingredients
To make this Eggnog Cheesecake, you’ll need a handful of ingredients that come together to create the creamiest, most delicious holiday dessert:
Crust
- 1 ½ cups graham cracker crumbs (about 12 graham crackers, crushed)
- ¼ cup granulated sugar
- ⅓ cup unsalted butter, melted
Cheesecake Filling
- 3 (8 oz) packages cream cheese, softened
- 1 cup granulated sugar
- 1 tsp vanilla extract
- 3 large eggs
- 1 cup eggnog (store-bought or homemade)
- 1 tsp ground cinnamon
- ½ tsp ground nutmeg
- 1 tbsp all-purpose flour (optional, helps thicken the filling)
Topping
- 1 cup heavy cream
- 2 tbsp powdered sugar
- ¼ tsp ground cinnamon
- Fresh nutmeg, for garnish (optional)
Why these ingredients?
- Graham cracker crumbs: These form the base of the crust, giving the cheesecake a buttery, slightly sweet foundation.
- Cream cheese: The star of the show! It’s what gives the cheesecake its creamy, smooth texture.
- Eggnog: The key ingredient that transforms a traditional cheesecake into a festive treat. It adds a rich flavor that’s perfect for the holidays.
- Cinnamon and nutmeg: These warm spices bring that comforting, festive aroma we all love during the holiday season.
- Heavy cream: For the whipped topping, which adds a light, airy contrast to the rich cheesecake filling.
Step-by-Step Instructions
1. Prepare the Crust
- Preheat your oven to 325°F (163°C).
- In a medium-sized bowl, combine the graham cracker crumbs, granulated sugar, and melted butter. Stir until everything is evenly mixed, and the crumbs are well-coated with the butter.
- Press the mixture into the bottom of a 9-inch springform pan, making sure to evenly spread it across the bottom. Use the back of a spoon to gently press it down and compact it.
- Bake the crust for about 10 minutes, then remove it from the oven and let it cool while you prepare the filling. This will give the crust a nice, golden color and a crisp texture.
2. Make the Cheesecake Filling
- In a large bowl, beat the softened cream cheese with an electric mixer on medium speed until it’s smooth and creamy, about 1-2 minutes.
- Gradually add the granulated sugar and continue to beat until it’s fully combined. Scrape down the sides of the bowl as needed.
- Add the eggs, one at a time, beating well after each addition. Be sure not to overmix.
- Stir in the vanilla extract, ground cinnamon, and ground nutmeg.
- Slowly pour in the eggnog and beat until the mixture is smooth and well-combined. If you’re using flour, add it now and mix until incorporated. The flour helps to stabilize the cheesecake filling, giving it a firmer texture.
3. Pour the Filling into the Crust
- Carefully pour the cheesecake filling into the prepared graham cracker crust. Use a spatula to smooth the top of the filling.
- Tap the pan gently on the counter to release any air bubbles.
4. Bake the Cheesecake
- Place the cheesecake in the oven and bake for 1 hour to 1 hour 15 minutes. The cheesecake should be set around the edges but still slightly jiggly in the center.
- If the top begins to brown too quickly, you can cover it with foil and continue baking.
- Once baked, turn off the oven and leave the cheesecake in the oven for 1 hour to cool slowly. This helps prevent cracking.
5. Chill the Cheesecake
- After an hour, remove the cheesecake from the oven and let it cool completely at room temperature.
- Once cooled, cover it and refrigerate for at least 4 hours, or overnight for the best results. The longer it chills, the firmer and more flavorful it becomes.
6. Prepare the Whipped Cream Topping
- In a medium bowl, whip the heavy cream with an electric mixer until soft peaks form.
- Add the powdered sugar and ground cinnamon, and continue whipping until stiff peaks form.
- Spread the whipped cream on top of the cheesecake just before serving, and garnish with a light dusting of fresh nutmeg for that perfect holiday touch.
How to Serve
This Eggnog Cheesecake is stunning on its own, but here are a few serving suggestions to take it to the next level:
- Top with whipped cream: You can never go wrong with a generous dollop of whipped cream on each slice of cheesecake.
- Add a sprinkle of nutmeg: A light dusting of fresh ground nutmeg adds a final festive touch.
- Pair with coffee or tea: A warm cup of spiced coffee or chai tea complements the rich, creamy cheesecake beautifully.
Additional Tips
To make sure your Eggnog Cheesecake turns out perfectly, here are a few helpful tips:
- Room Temperature Ingredients: Ensure your cream cheese and eggs are at room temperature before you start. This helps the filling come together smoothly and prevents lumps.
- Don’t Overmix: When mixing the filling, stop as soon as everything is combined. Overmixing can lead to cracks in the cheesecake.
- Water Bath (Optional): For an extra-smooth, crack-free cheesecake, consider baking it in a water bath. Simply place the springform pan in a larger pan filled with hot water about halfway up the sides of the pan.
- Prevent Overbaking: Don’t worry if the center still jiggles a bit when you remove it from the oven. It will firm up as it cools.
- Cool Slowly: Allow your cheesecake to cool in the oven before refrigerating to prevent cracks.
Recipe Variations
Here are a few ways to switch up the flavor of this Eggnog Cheesecake:
- Add rum extract: For an extra kick of flavor, you can add 1 tsp of rum extract to the filling. It enhances the eggnog flavor without any actual alcohol.
- Gluten-Free Option: Use gluten-free graham crackers or almond flour for the crust to make this dessert gluten-free.
- Top with Crushed Gingerbread Cookies: Crushed gingerbread cookies add a delightful crunch and spice to the topping, giving it an extra holiday vibe.
- Caramel Swirl: Swirl some caramel sauce through the cheesecake filling before baking for a delicious caramel-egg nog flavor fusion.
Serving Suggestions
Here are some complementary dishes to pair with your Eggnog Cheesecake:
- Side Dishes: Serve this cheesecake after a cozy dinner with roasted Brussels sprouts or a creamy mashed potato dish.
- Beverages: Pair with a rich, spiced chai latte or a warm apple cider for an ultimate winter treat.
- For Kids: If you’re serving kids, consider swapping the eggnog with a non-alcoholic version and serve the cheesecake with a side of hot chocolate.
Freezing and Storage
If you happen to have leftovers, here’s how to store or freeze your Eggnog Cheesecake:
- Storage: Store any leftover cheesecake in an airtight container in the refrigerator for up to 5 days.
- Freezing: To freeze, place the cheesecake on a baking sheet and freeze it until solid. Then, wrap it tightly in plastic wrap and aluminum foil. It can be frozen for up to 3 months.
- Reheating: Thaw frozen cheesecake in the fridge overnight before serving.
Special Equipment
To make sure your Eggnog Cheesecake turns out just right, you’ll need a few tools:
- Springform pan: This allows you to easily release the cheesecake without damaging it.
- Electric mixer: Helps to beat the cream cheese and eggs to a smooth consistency.
- Fine mesh strainer: Useful for sifting the powdered sugar for the whipped cream topping.
FAQ Section
Can I use store-bought eggnog?
Yes! Store-bought eggnog works perfectly for this recipe. Just make sure to choose a good-quality, creamy eggnog.
Can I make this cheesecake ahead of time?
Absolutely! You can make this cheesecake 1-2 days ahead of time. Just store it in the fridge until you’re ready to serve.
How do I avoid cracks in the cheesecake?
The best way to prevent cracks is to bake the cheesecake at a lower temperature, cool it slowly, and avoid overmixing the batter.
Can I freeze the cheesecake?
Yes, you can freeze the cheesecake for up to 3 months. Just be sure to wrap it tightly in plastic wrap and aluminum foil before freezing.
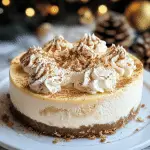
Eggnog Cheesecake
- Total Time: 4 hours
Ingredients
For the Crust
- 1 ½ cups graham cracker crumbs (about 12 graham crackers, crushed)
- ¼ cup granulated sugar
- ⅓ cup unsalted butter, melted
For the Cheesecake Filling
- 3 (8 oz) packages cream cheese, softened
- 1 cup granulated sugar
- 1 tsp vanilla extract
- 3 large eggs
- 1 cup eggnog (store-bought or homemade)
- 1 tsp ground cinnamon
- ½ tsp ground nutmeg
- 1 tbsp all-purpose flour (optional, helps thicken the filling)
For the Topping
- 1 cup heavy cream
- 2 tbsp powdered sugar
- ¼ tsp ground cinnamon
- Fresh nutmeg, for garnish (optional)
Instructions
1. Prepare the Crust
- Preheat your oven to 325°F (163°C).
- In a medium-sized bowl, combine the graham cracker crumbs, granulated sugar, and melted butter. Stir until everything is evenly mixed, and the crumbs are well-coated with the butter.
- Press the mixture into the bottom of a 9-inch springform pan, making sure to evenly spread it across the bottom. Use the back of a spoon to gently press it down and compact it.
- Bake the crust for about 10 minutes, then remove it from the oven and let it cool while you prepare the filling. This will give the crust a nice, golden color and a crisp texture.
2. Make the Cheesecake Filling
- In a large bowl, beat the softened cream cheese with an electric mixer on medium speed until it’s smooth and creamy, about 1-2 minutes.
- Gradually add the granulated sugar and continue to beat until it’s fully combined. Scrape down the sides of the bowl as needed.
- Add the eggs, one at a time, beating well after each addition. Be sure not to overmix.
- Stir in the vanilla extract, ground cinnamon, and ground nutmeg.
- Slowly pour in the eggnog and beat until the mixture is smooth and well-combined. If you’re using flour, add it now and mix until incorporated. The flour helps to stabilize the cheesecake filling, giving it a firmer texture.
3. Pour the Filling into the Crust
- Carefully pour the cheesecake filling into the prepared graham cracker crust. Use a spatula to smooth the top of the filling.
- Tap the pan gently on the counter to release any air bubbles.
4. Bake the Cheesecake
- Place the cheesecake in the oven and bake for 1 hour to 1 hour 15 minutes. The cheesecake should be set around the edges but still slightly jiggly in the center.
- If the top begins to brown too quickly, you can cover it with foil and continue baking.
- Once baked, turn off the oven and leave the cheesecake in the oven for 1 hour to cool slowly. This helps prevent cracking.
5. Chill the Cheesecake
- After an hour, remove the cheesecake from the oven and let it cool completely at room temperature.
- Once cooled, cover it and refrigerate for at least 4 hours, or overnight for the best results. The longer it chills, the firmer and more flavorful it becomes.
6. Prepare the Whipped Cream Topping
- In a medium bowl, whip the heavy cream with an electric mixer until soft peaks form.
- Add the powdered sugar and ground cinnamon, and continue whipping until stiff peaks form.
- Spread the whipped cream on top of the cheesecake just before serving, and garnish with a light dusting of fresh nutmeg for that perfect holiday touch.
- Prep Time: 20 minutes
- Cook Time: 1 hour
Nutrition
- Serving Size: 10
- Calories: 350
- Sugar: 22g
- Fat: 24g
- Carbohydrates: 30g
- Protein: 6g
Conclusion
This Eggnog Cheesecake is the perfect dessert for the holiday season. With its rich, creamy filling and warm spices, it’s sure to be a hit at your next holiday gathering. Don’t be intimidated by the process—it’s easier than it looks, and the result is absolutely worth it. I’d love to hear how your cheesecake turns out! Snap a picture and tag me on Instagram—I can’t wait to see your creations!
Happy holidays, and happy baking!

