Introduction
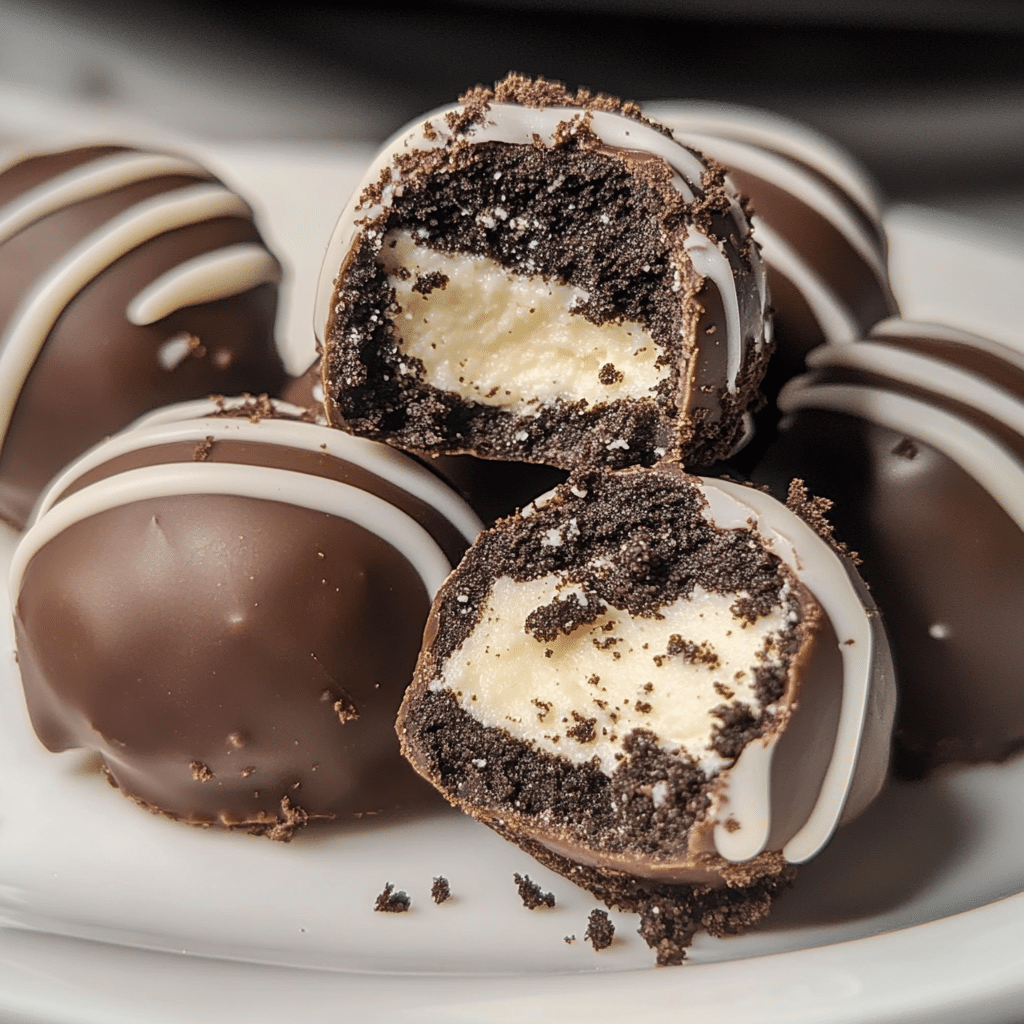
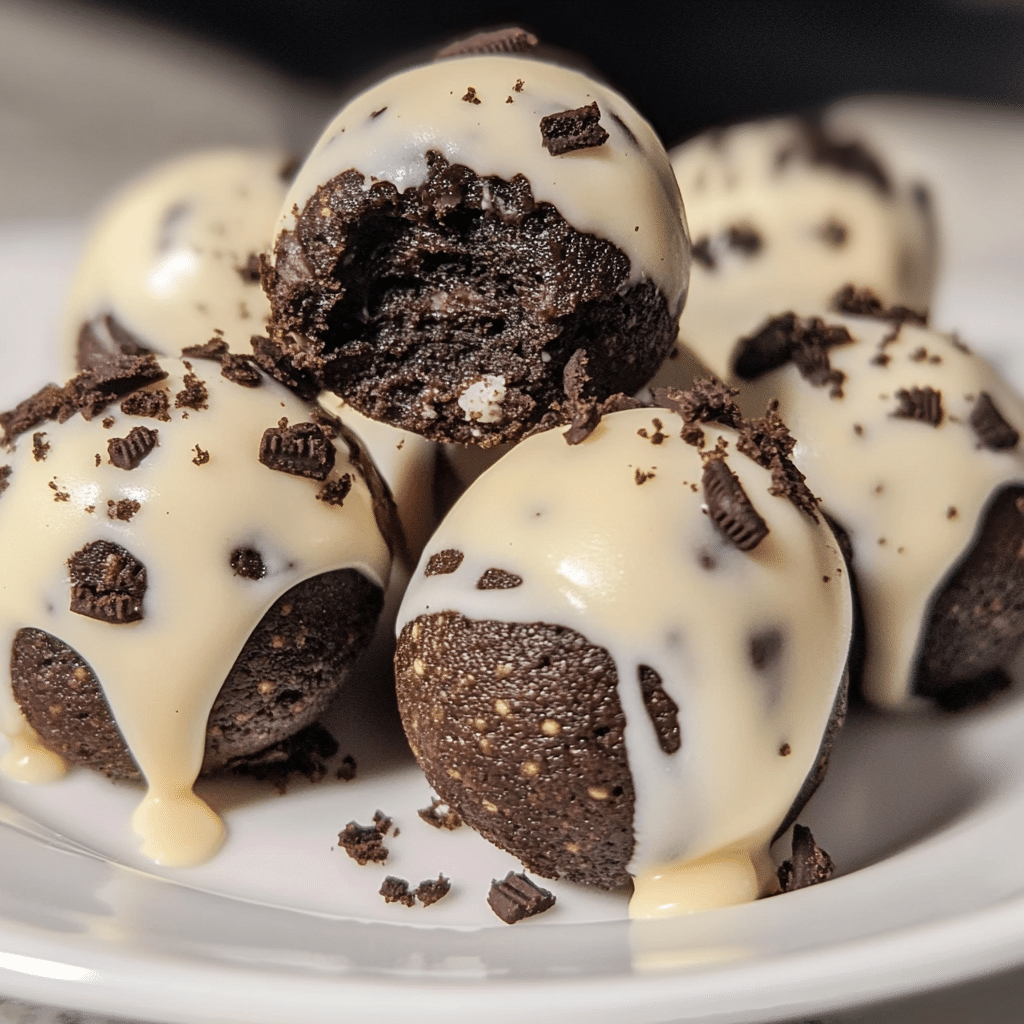
Oreo cheesecake balls are the ultimate dessert for anyone who loves the creamy goodness of cheesecake and the irresistible crunch of Oreos. If you’ve ever craved a bite-sized, no-bake treat that combines the best of both worlds, then this recipe is for you. These bite-sized goodies are not only easy to make but also an absolute crowd-pleaser. Picture this: a smooth, creamy cheesecake filling encased in a crunchy, chocolatey Oreo coating. It’s the perfect combination of flavors and textures that’ll make you swoon with every bite.
What’s even better is how simple it is to whip up this treat. There’s no baking involved—just a few ingredients and a bit of chilling time, and you’ve got yourself a decadent dessert. The beauty of Oreo cheesecake balls is that they are customizable. Want to add a bit of drizzle or make them extra chocolatey? Go for it! These little bites are so versatile, and they are sure to become a favorite at parties, gatherings, or even as a sweet treat to enjoy by yourself on a cozy afternoon.
I first discovered these Oreo cheesecake balls when I was looking for a way to use up some leftover Oreos. I was craving cheesecake, but didn’t want to deal with the hassle of making a full cheesecake. One quick Google search later, and I found a recipe that would change my dessert game forever. These cheesecake balls became a family favorite almost immediately, and now they’re my go-to treat whenever I need something quick, easy, and absolutely delicious.
Why You’ll Love This Recipe
Let me tell you, these Oreo cheesecake balls are going to be your new favorite treat for so many reasons. First of all, they are so easy to make. You don’t need any special equipment or hard-to-find ingredients—just Oreos, cream cheese, powdered sugar, and a bit of chocolate. It’s the perfect recipe for beginners or anyone who’s short on time but still wants to make something amazing. Trust me, you don’t need to be a pro to pull these off!
The best part? These Oreo cheesecake balls are family-friendly. My kids absolutely love them, and they’re the perfect size for little hands to grab. And even though they’re simple to make, they look impressive when you set them out on a plate. They’re perfect for a party, holiday gathering, or just a fun afternoon snack.
Taste-wise, these cheesecake balls hit all the right notes. The rich, creamy cheesecake filling is perfectly balanced by the chocolatey crunch of the Oreos. It’s like eating cheesecake in bite-sized form—but without any of the complicated steps or baking time. It’s the easiest indulgence you’ll ever make, and once you try it, I bet you’ll make these little balls of heaven again and again.
Preparation Time and Servings
- Total Time: 20 minutes (plus chilling time)
- Servings: Makes 20-25 Oreo cheesecake balls (depending on the size)
- Nutrition Facts: Calories per serving: 150, Protein: 2g, Carbs: 18g, Fat: 9g
Ingredients
Here’s what you’ll need to make these delicious Oreo cheesecake balls:
- 18 Oreos: These are the base of your cheesecake balls. You’ll crush them up to create a crunchy, chocolatey crust. Don’t skimp on the Oreos—this is where all the flavor starts!
- 8 oz cream cheese: Softened cream cheese is key to getting that smooth, creamy filling that makes these cheesecake balls so irresistible.
- 1 cup powdered sugar: This adds the sweetness and helps bind the filling together.
- 1 teaspoon vanilla extract: A little vanilla brings out the flavor and complements the Oreos and cream cheese beautifully.
- 8 oz chocolate (semi-sweet or milk): For coating the balls. You can choose your favorite type of chocolate, but I recommend semi-sweet for a nice balance of sweetness and richness.
Step-by-Step Instructions
Step 1: Crush the Oreos
Start by crushing the Oreos into fine crumbs. You can do this using a food processor for quick results, or you can place the cookies in a Ziploc bag and crush them with a rolling pin. Either way, you want them to be small crumbs with no big chunks left. Once they’re crushed, set them aside in a large mixing bowl.
Step 2: Prepare the Cream Cheese Mixture
Now, let’s move on to the creamy filling. Place the softened cream cheese in the bowl of a stand mixer or a regular mixing bowl if you’re using a hand mixer. Add the powdered sugar and vanilla extract. Beat the mixture until it’s smooth and creamy. If you don’t have a mixer, you can use a whisk and a little elbow grease—it’ll take a bit longer, but it works just fine!
Step 3: Mix in the Crushed Oreos
Once your cream cheese mixture is smooth, add the crushed Oreos. Mix everything together until the crumbs are evenly distributed throughout the creamy filling. You’ll notice the mixture starts to come together into a dough-like consistency. If it feels too sticky or wet, don’t worry! You can adjust it by adding a few more crushed Oreos or chilling it for 15 minutes.
Step 4: Form the Cheesecake Balls
Now comes the fun part! Using your hands (or a spoon if you prefer), take small portions of the mixture and roll them into balls, about 1-inch in diameter. Try to make them as uniform as possible, so they all cook evenly. Don’t worry if they’re not perfect—this is a no-stress recipe. Place each ball onto a parchment-lined baking sheet or plate.
Step 5: Chill the Cheesecake Balls
Once your balls are all rolled, pop them in the fridge to chill for at least 30 minutes. This helps them firm up and makes them easier to coat with chocolate.
Step 6: Coat in Chocolate
While the cheesecake balls are chilling, melt your chocolate. You can do this in a microwave-safe bowl in the microwave in 30-second intervals, stirring in between, or you can use a double boiler method on the stovetop. Once the chocolate is melted and smooth, it’s time to dip!
Take each chilled cheesecake ball and dip it into the melted chocolate, making sure it’s fully coated. You can use a fork or a toothpick to make the dipping process easier. After dipping, gently tap the fork on the edge of the bowl to remove any excess chocolate.
Step 7: Chill Again
Place the chocolate-covered cheesecake balls back onto the parchment paper and let them chill for another 30 minutes to 1 hour, or until the chocolate hardens. If you’re in a rush, you can speed this up by placing them in the freezer for 10-15 minutes.
Step 8: Serve and Enjoy
Once the chocolate has set, your Oreo cheesecake balls are ready to serve! You can store them in the fridge for up to a week (if they last that long!). These little treats are perfect for any occasion, and they’re guaranteed to disappear in no time.
How to Serve
These Oreo cheesecake balls are versatile and can be served in several ways:
- For a Party: Arrange them on a platter as a bite-sized dessert option. They’ll be the star of the show!
- As a Sweet Snack: Grab one (or a few!) for a quick treat during the day.
- As a Gift: Package them in a cute gift box or jar, perfect for giving during the holidays or special occasions.
- On a Dessert Table: Pair them with other mini desserts like chocolate truffles or cake pops for a variety of treats at your next gathering.
Additional Tips
To make sure your Oreo cheesecake balls turn out perfectly, here are a few tips:
- Use Softened Cream Cheese: Make sure the cream cheese is softened to room temperature before you mix it. Cold cream cheese will be harder to blend and might leave lumps in your filling.
- Chill for Firmness: Don’t skip the chilling steps. They’re essential for helping the cheesecake balls hold their shape and making them easier to dip in chocolate.
- Adjust the Sweetness: If you prefer a sweeter cheesecake filling, feel free to add more powdered sugar to taste.
- Use Quality Chocolate: Since the chocolate is a big part of the flavor, use a good quality chocolate that you enjoy. I love semi-sweet, but feel free to go for milk chocolate or even white chocolate for a different flavor!
- Make Ahead: These cheesecake balls are perfect for making ahead! You can prep them the day before and chill them overnight.
Recipe Variations
The beauty of Oreo cheesecake balls is that they’re easy to customize. Here are a few variations you can try:
- Mint Oreo Cheesecake Balls: Use mint-flavored Oreos for a refreshing twist.
- Peanut Butter Oreo Cheesecake Balls: Add a spoonful of peanut butter to the filling for a delicious peanut butter and Oreo combination.
- Chocolate Drizzle: After dipping the balls in chocolate, drizzle white chocolate or peanut butter over the top for extra flavor and visual appeal.
- Mini Oreo Cheesecake Bites: Instead of rolling them into full-sized balls, roll them into smaller bite-sized pieces for a fun variation!
Freezing and Storage
Storage: Store leftover Oreo cheesecake balls in an airtight container in the refrigerator for up to 1 week. They’re a great make-ahead treat, and their flavors only improve after sitting in the fridge for a bit.
Freezing: You can freeze these cheesecake balls if you want to make them in advance or have extras left over. Place them on a baking sheet and freeze until solid. Then, transfer them to a freezer-safe container or Ziploc bag and store in the freezer for up to 3 months. When you’re ready to enjoy them, let them thaw in the fridge for a few hours or enjoy them straight from the freezer!
Special Equipment
Here’s what you’ll need for this recipe:
- Food Processor: To easily crush the Oreos into fine crumbs. You can also use a rolling pin if you don’t have a processor.
- Microwave-Safe Bowl: For melting the chocolate.
- Parchment Paper: To line the baking sheet, so the cheesecake balls don’t stick while they chill.
FAQ Section
- Can I use regular Oreos instead of any specific flavor? Yes, regular Oreos are perfect for this recipe! But feel free to experiment with different flavors if you want to switch things up.
- Can I make these ahead of time? Absolutely! These cheesecake balls store well in the fridge for up to a week, or you can freeze them for longer storage.
- Do I need to bake the balls? No baking required! These Oreo cheesecake balls are a no-bake treat, making them super easy to prepare.
- Can I use low-fat cream cheese? Yes, you can use low-fat cream cheese, though the texture might be a little different. Full-fat cream cheese gives the best creamy consistency.

Easy Oreo Cheesecake Balls
- Total Time: 20 minutes
Ingredients
- 18 Oreos: These are the base of your cheesecake balls. You’ll crush them up to create a crunchy, chocolatey crust. Don’t skimp on the Oreos—this is where all the flavor starts!
- 8 oz cream cheese: Softened cream cheese is key to getting that smooth, creamy filling that makes these cheesecake balls so irresistible.
- 1 cup powdered sugar: This adds the sweetness and helps bind the filling together.
- 1 teaspoon vanilla extract: A little vanilla brings out the flavor and complements the Oreos and cream cheese beautifully.
- 8 oz chocolate (semi-sweet or milk): For coating the balls. You can choose your favorite type of chocolate, but I recommend semi-sweet for a nice balance of sweetness and richness.
Instructions
Step 1: Crush the Oreos
Start by crushing the Oreos into fine crumbs. You can do this using a food processor for quick results, or you can place the cookies in a Ziploc bag and crush them with a rolling pin. Either way, you want them to be small crumbs with no big chunks left. Once they’re crushed, set them aside in a large mixing bowl.
Step 2: Prepare the Cream Cheese Mixture
Now, let’s move on to the creamy filling. Place the softened cream cheese in the bowl of a stand mixer or a regular mixing bowl if you’re using a hand mixer. Add the powdered sugar and vanilla extract. Beat the mixture until it’s smooth and creamy. If you don’t have a mixer, you can use a whisk and a little elbow grease—it’ll take a bit longer, but it works just fine!
Step 3: Mix in the Crushed Oreos
Once your cream cheese mixture is smooth, add the crushed Oreos. Mix everything together until the crumbs are evenly distributed throughout the creamy filling. You’ll notice the mixture starts to come together into a dough-like consistency. If it feels too sticky or wet, don’t worry! You can adjust it by adding a few more crushed Oreos or chilling it for 15 minutes.
Step 4: Form the Cheesecake Balls
Now comes the fun part! Using your hands (or a spoon if you prefer), take small portions of the mixture and roll them into balls, about 1-inch in diameter. Try to make them as uniform as possible, so they all cook evenly. Don’t worry if they’re not perfect—this is a no-stress recipe. Place each ball onto a parchment-lined baking sheet or plate.
Step 5: Chill the Cheesecake Balls
Once your balls are all rolled, pop them in the fridge to chill for at least 30 minutes. This helps them firm up and makes them easier to coat with chocolate.
Step 6: Coat in Chocolate
While the cheesecake balls are chilling, melt your chocolate. You can do this in a microwave-safe bowl in the microwave in 30-second intervals, stirring in between, or you can use a double boiler method on the stovetop. Once the chocolate is melted and smooth, it’s time to dip!
Take each chilled cheesecake ball and dip it into the melted chocolate, making sure it’s fully coated. You can use a fork or a toothpick to make the dipping process easier. After dipping, gently tap the fork on the edge of the bowl to remove any excess chocolate.
Step 7: Chill Again
Place the chocolate-covered cheesecake balls back onto the parchment paper and let them chill for another 30 minutes to 1 hour, or until the chocolate hardens. If you’re in a rush, you can speed this up by placing them in the freezer for 10-15 minutes.
Step 8: Serve and Enjoy
Once the chocolate has set, your Oreo cheesecake balls are ready to serve! You can store them in the fridge for up to a week (if they last that long!). These little treats are perfect for any occasion, and they’re guaranteed to disappear in no time.
Nutrition
- Serving Size: 25
- Calories: 150
- Fat: 9g
- Carbohydrates: 18g
- Protein: 2g
Conclusion
These Oreo cheesecake balls are the perfect treat when you want something sweet and indulgent without spending hours in the kitchen. Whether you’re serving them at a party, bringing them to a family gathering, or just indulging in a sweet snack, they’re sure to be a hit. The combination of the creamy cheesecake filling and the crunchy Oreo coating is irresistible, and they’re so easy to make—anyone can pull this recipe off!
I hope you enjoy making and eating these Oreo cheesecake balls as much as I do. Don’t forget to share your creations with me! Tag me on Instagram, or leave a comment below to let me know how yours turned out. I can’t wait to see your sweet, cheesecake-filled creations!

