Introduction
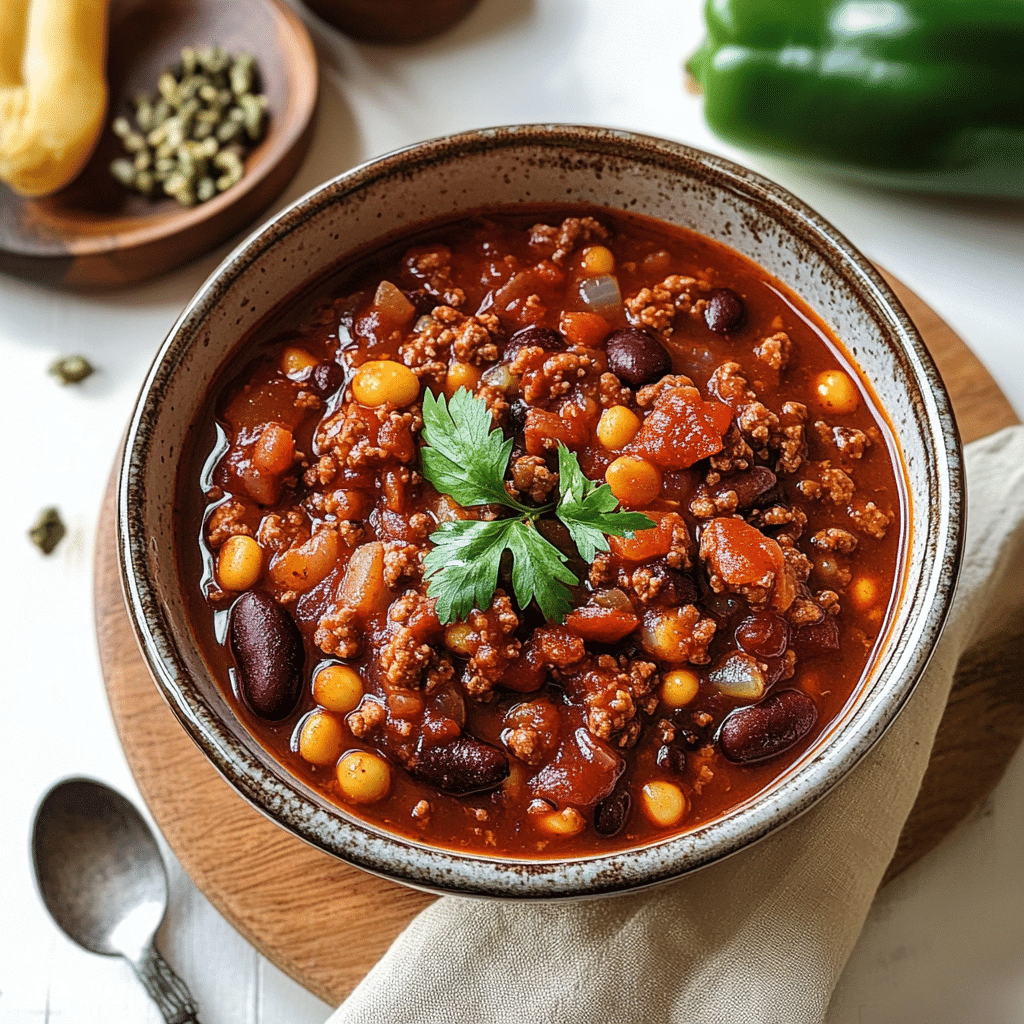
There’s something about a steaming bowl of Cowboy Chili that just hits the spot, especially when it’s chilly outside. This chili is the kind of dish that makes you feel cozy and satisfied with every spoonful. Packed with ground beef, smoky spices, beans, and a little bit of heat, it’s perfect for a weeknight dinner, a game day feast, or a family gathering. What makes this recipe special isn’t just the layers of flavor (although trust me, there are plenty of those!). It’s also how easy it is to throw together, even on your busiest days.
I first made this Cowboy Chili years ago after a long day of hiking, and it was the ultimate comfort food. My family loves it because it’s hearty enough to fill you up, but not so heavy that it weighs you down. It’s become one of those recipes that’s now a regular at our dinner table and special occasions. The perfect blend of beans, spices, and ground beef, all simmered to perfection—it’s a recipe that’s simple but feels like a real treat. If you’re in the mood for something filling and flavorful, this is the chili to try!
So whether you’re cooking for yourself, a crowd, or making it ahead for meal prep, I promise this Cowboy Chili will be a hit. It’s hearty, satisfying, and full of bold flavors. Grab a spoon, and let’s dive into this chili recipe!
Why You’ll Love This Recipe
This Cowboy Chili isn’t just any chili—it’s packed with rich, smoky flavor that’ll make your taste buds sing. Here’s why this recipe is a must-try:
- Super Easy to Make: With simple ingredients and a straightforward method, this chili comes together in no time. You won’t need any fancy equipment or hard-to-find ingredients. Just a big pot and some basic kitchen tools.
- Perfect for Any Crowd: Whether you’re feeding a family or hosting a chili cook-off, this recipe can easily be scaled up to serve more people. It’s also great for meal prep—you can make it ahead and enjoy it throughout the week!
- Bold and Hearty Flavor: The combination of ground beef, spices, and a variety of beans creates a chili that’s both hearty and rich. The spices add the perfect amount of kick, but it’s not overwhelmingly spicy—just the right amount of heat to warm you up.
- Comfort Food at Its Best: There’s something magical about the way a bowl of chili warms you from the inside out. Pair it with cornbread or tortilla chips, and you’ve got a meal that’s perfect for any time of year.
Preparation Time and Servings
- Total Time: 1 hour 15 minutes
- Prep Time: 15 minutes
- Cook Time: 1 hour
- Servings: 6-8 servings
Nutrition Facts (per serving):
- Calories: 450
- Protein: 30g
- Carbs: 40g
- Fat: 20g
- Fiber: 12g
- Sugar: 6g
Ingredients
For this Cowboy Chili, you’ll need a few key ingredients that make it hearty and full of flavor:
- 1 lb ground beef (or turkey for a lighter version)
- 1 medium onion, diced
- 2 cloves garlic, minced
- 1 bell pepper, diced (red or green)
- 1 can (15 oz) kidney beans, drained and rinsed
- 1 can (15 oz) black beans, drained and rinsed
- 1 can (15 oz) pinto beans, drained and rinsed
- 1 can (28 oz) diced tomatoes
- 1 can (6 oz) tomato paste
- 1 cup beef broth (or vegetable broth for a lighter version)
- 1 tbsp chili powder
- 1 tsp ground cumin
- 1 tsp smoked paprika (adds a smoky depth)
- 1/2 tsp ground cayenne pepper (adjust to your preferred spice level)
- Salt and pepper, to taste
- 1 tbsp olive oil (for sautéing)
- Optional toppings: shredded cheese, sour cream, chopped cilantro, green onions
The combination of beans is key here—they help create that hearty, filling base. The diced tomatoes and tomato paste bring richness, while the chili powder and smoked paprika give it that signature cowboy flavor. The ground beef (or turkey) is the perfect protein to tie everything together, creating a meaty, satisfying dish.
Step-by-Step Instructions
Now that you’ve got your ingredients, it’s time to get cooking! Let’s break down the process step by step to make sure your Cowboy Chili turns out just right.
- Sauté the Vegetables
Start by heating 1 tablespoon of olive oil in a large pot over medium heat. Once hot, add your diced onions and bell pepper. Sauté for about 5-7 minutes, or until the vegetables are soft and the onions are translucent. The smell is already starting to fill the kitchen, right? Add the minced garlic and cook for another minute. You want the garlic to become fragrant but not burnt. - Brown the Meat
Add the ground beef to the pot. Break it up with a wooden spoon or spatula as it cooks. Brown the meat for about 7-10 minutes, stirring occasionally, until it’s fully cooked and no longer pink. If there’s any excess fat in the pot, feel free to drain it, but I usually leave a little to help add flavor. - Add the Spices
It’s time to spice things up! Sprinkle in the chili powder, cumin, smoked paprika, cayenne, salt, and pepper. Stir everything together, allowing the spices to toast for a minute or so. This helps bring out their full flavor and adds that smoky, spicy depth that makes this chili so delicious. - Add the Tomatoes and Beans
Stir in the diced tomatoes (with their juices) and tomato paste. The tomato paste will help thicken the chili, creating that perfect texture. Next, add all three types of beans—kidney beans, black beans, and pinto beans. Don’t forget to rinse them well to remove any excess sodium or canning liquid. - Pour in the Broth
Add the beef broth (or vegetable broth if you prefer). Stir everything together to combine. The broth helps create a rich, flavorful base for the chili, while also giving it the perfect amount of liquid. - Simmer and Let the Flavors Meld
Bring the chili to a simmer, then reduce the heat to low. Let it cook uncovered for about 45 minutes, stirring occasionally. This will allow all the flavors to meld together, creating a rich, hearty chili. If the chili gets too thick, you can always add a little extra broth or water to reach your desired consistency. - Taste and Adjust
After 45 minutes, taste the chili and adjust the seasoning. Do you want it spicier? Add a pinch of cayenne or some hot sauce. Need more salt? Add a little more to balance the flavors. - Serve and Enjoy!
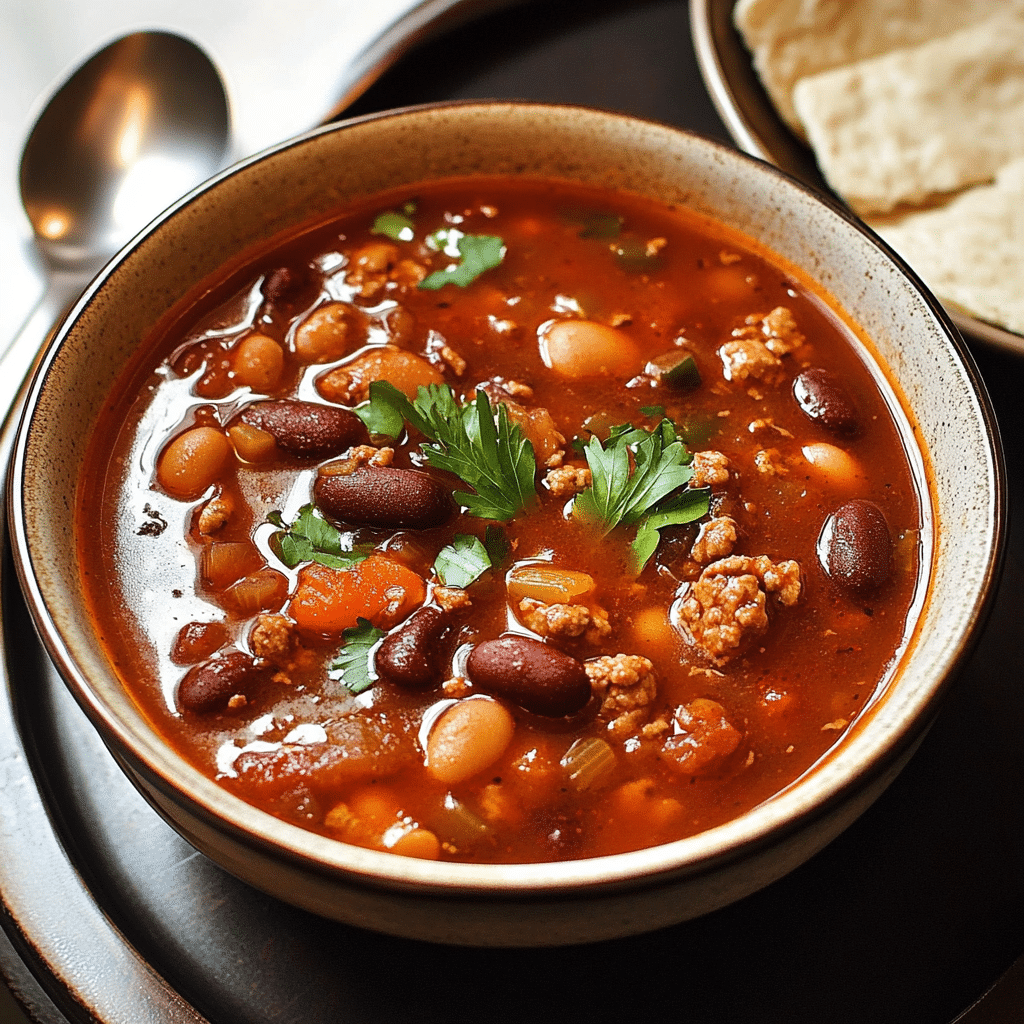
Once your chili has thickened and the flavors are perfectly balanced, it’s time to serve! Ladle it into bowls and top with your favorite garnishes, like shredded cheese, sour cream, cilantro, or green onions. Grab a spoon and dig in—your Cowboy Chili is ready to be devoured!
How to Serve
There are so many ways to enjoy this Cowboy Chili! Here are a few serving suggestions to make your meal complete:
- Classic: Serve the chili in a bowl with a sprinkle of shredded cheese, a dollop of sour cream, and some fresh cilantro.
- Taco-style: Serve over warm tortillas or tortilla chips for a fun, handheld version. Add some salsa, guacamole, and a squeeze of lime for extra flavor.
- Chili Bar: Set up a chili bar with toppings like shredded cheese, sour cream, diced onions, jalapeños, and tortilla chips. Let everyone customize their bowl!
- Side Dishes: Pair your chili with cornbread, a side salad, or roasted vegetables for a balanced meal.
Additional Tips
To make sure your Cowboy Chili turns out perfect, here are some helpful tips:
- Drain the Beans: Always rinse your beans before adding them to the chili. This removes the canning liquid and reduces the sodium content.
- Use Fresh Spices: Spices lose their potency over time. Make sure your chili powder, cumin, and paprika are fresh for maximum flavor.
- Simmer Low and Slow: If you have the time, let the chili simmer on low for an hour or longer. The longer it simmers, the more the flavors will meld together. Just be sure to stir occasionally.
- Top It Off: The right toppings can take your chili to the next level. I love adding a sprinkle of cheese, a dollop of sour cream, and a few slices of fresh jalapeño for a spicy kick.
- Adjust the Heat: If you like your chili spicier, feel free to add extra cayenne pepper or a chopped jalapeño while the chili simmers. For a milder version, reduce the amount of cayenne.
Recipe Variations
One of the best things about chili is how easy it is to customize! Here are a few variations you can try:
- Vegetarian Option: Swap out the meat for a combination of lentils and mushrooms. These two ingredients mimic the texture of ground beef while adding plenty of heartiness and flavor.
- Turkey Chili: For a leaner option, use ground turkey instead of beef. It will still be just as flavorful but with less fat.
- Spicy Kick: Add a diced jalapeño or a few dashes of hot sauce to the chili for an extra spicy punch. You can also sprinkle in some crushed red pepper flakes for heat.
- Smoky Chipotle: For a smoky depth, add 1-2 chopped chipotle peppers in adobo sauce to the mix. They’ll give the chili a unique, smoky flavor.
Serving Suggestions
Looking for the perfect side dishes to pair with your Cowboy Chili? Here are a few ideas to complete your meal:
- Side Dishes: Serve your chili with a side of homemade cornbread or a light green salad with a tangy vinaigrette.
- Wine Pairings: A crisp, refreshing beer like a pale ale pairs wonderfully with the richness of the chili. If you prefer wine, go for a medium-bodied red like a Merlot or Zinfandel to complement the spice.
- For the Kids: Serve with soft dinner rolls or over buttered noodles for a kid-friendly version that they’ll love.
Freezing and Storage
Leftovers? No problem! Here’s how to store and freeze your Cowboy Chili:
- Storage: Store leftover chili in an airtight container in the fridge for up to 3-4 days. It actually gets better the next day as the flavors continue to develop.
- Freezing: To freeze, let the chili cool completely. Then, transfer it to a freezer-safe container or a resealable bag. Freeze for up to 3 months. When you’re ready to eat, simply thaw overnight in the fridge and reheat on the stovetop or in the microwave.
- Reheating: When reheating, add a splash of water or broth to bring it back to the right consistency. Stir occasionally to ensure it heats evenly.
Special Equipment
You don’t need anything fancy to make this Cowboy Chili, but here are a few tools that’ll make the process a breeze:
- Dutch Oven or Large Pot: A sturdy pot helps cook everything evenly and allows the chili to simmer without burning.
- Wooden Spoon: For stirring the meat and spices, a wooden spoon is the best tool to avoid damaging your cookware.
- Storage Containers: If you plan to store or freeze your chili, having airtight containers will keep it fresh.
FAQ Section
Can I make Cowboy Chili ahead of time?
Yes! In fact, the chili tastes even better the next day. You can prepare it a day or two ahead and store it in the fridge.
Can I use store-bought chili seasoning?
Absolutely! If you’re short on time, you can use a pre-made chili seasoning mix, but I recommend adjusting the other spices to suit your taste.
Can I make this chili vegetarian?
Yes! Simply swap out the meat for a combination of lentils and mushrooms for a hearty vegetarian chili.
What if I don’t like beans?
If beans aren’t your thing, feel free to leave them out. You can add extra meat or veggies to make up for the missing texture.

Cowboy Chili
- Total Time: 1 hour
Ingredients
- 1 lb ground beef (or turkey for a lighter version)
- 1 medium onion, diced
- 2 cloves garlic, minced
- 1 bell pepper, diced (red or green)
- 1 can (15 oz) kidney beans, drained and rinsed
- 1 can (15 oz) black beans, drained and rinsed
- 1 can (15 oz) pinto beans, drained and rinsed
- 1 can (28 oz) diced tomatoes
- 1 can (6 oz) tomato paste
- 1 cup beef broth (or vegetable broth for a lighter version)
- 1 tbsp chili powder
- 1 tsp ground cumin
- 1 tsp smoked paprika (adds a smoky depth)
- 1/2 tsp ground cayenne pepper (adjust to your preferred spice level)
- Salt and pepper, to taste
- 1 tbsp olive oil (for sautéing)
- Optional toppings: shredded cheese, sour cream, chopped cilantro, green onions
Instructions
- Sauté the Vegetables
Start by heating 1 tablespoon of olive oil in a large pot over medium heat. Once hot, add your diced onions and bell pepper. Sauté for about 5-7 minutes, or until the vegetables are soft and the onions are translucent. The smell is already starting to fill the kitchen, right? Add the minced garlic and cook for another minute. You want the garlic to become fragrant but not burnt. - Brown the Meat
Add the ground beef to the pot. Break it up with a wooden spoon or spatula as it cooks. Brown the meat for about 7-10 minutes, stirring occasionally, until it’s fully cooked and no longer pink. If there’s any excess fat in the pot, feel free to drain it, but I usually leave a little to help add flavor. - Add the Spices
It’s time to spice things up! Sprinkle in the chili powder, cumin, smoked paprika, cayenne, salt, and pepper. Stir everything together, allowing the spices to toast for a minute or so. This helps bring out their full flavor and adds that smoky, spicy depth that makes this chili so delicious. - Add the Tomatoes and Beans
Stir in the diced tomatoes (with their juices) and tomato paste. The tomato paste will help thicken the chili, creating that perfect texture. Next, add all three types of beans—kidney beans, black beans, and pinto beans. Don’t forget to rinse them well to remove any excess sodium or canning liquid. - Pour in the Broth
Add the beef broth (or vegetable broth if you prefer). Stir everything together to combine. The broth helps create a rich, flavorful base for the chili, while also giving it the perfect amount of liquid. - Simmer and Let the Flavors Meld
Bring the chili to a simmer, then reduce the heat to low. Let it cook uncovered for about 45 minutes, stirring occasionally. This will allow all the flavors to meld together, creating a rich, hearty chili. If the chili gets too thick, you can always add a little extra broth or water to reach your desired consistency. - Taste and Adjust
After 45 minutes, taste the chili and adjust the seasoning. Do you want it spicier? Add a pinch of cayenne or some hot sauce. Need more salt? Add a little more to balance the flavors. - Serve and Enjoy!
Once your chili has thickened and the flavors are perfectly balanced, it’s time to serve! Ladle it into bowls and top with your favorite garnishes, like shredded cheese, sour cream, cilantro, or green onions. Grab a spoon and dig in—your Cowboy Chili is ready to be devoured!
- Prep Time: 15 minutes
- Cook Time: 1 hour
Nutrition
- Serving Size: 8
- Calories: 450
- Sugar: 6g
- Fat: 20g
- Carbohydrates: 40g
- Fiber: 12g
- Protein: 30g
Conclusion
I can’t wait for you to try this Cowboy Chili! It’s a family favorite in my household, and I’m sure it will be in yours too. Whether you’re cooking it up for a weeknight dinner or serving it at your next party, it’s bound to impress. Don’t forget to share your photos and tag me on Instagram—I’d love to see how your chili turns out! And if you’re looking for more comforting recipes, I’ve got plenty more up my sleeve.

